Trader Joe’s Mini Tacos Instructions: A Comprehensive Guide
Trader Joe’s offers a convenient and tasty frozen option with their mini tacos, becoming a popular choice for quick meals and snacks. These instructions will guide you through various cooking methods!
Trader Joe’s Mini Tacos have quickly become a sensation, captivating snackers and meal-preppers alike with their convenience and delightful flavor profile. These bite-sized delights offer a satisfying crunch and a savory filling, making them a versatile option for any occasion. The appeal lies in their simplicity – a ready-to-cook solution for those busy weeknights or spontaneous cravings.
The frozen food aisle at Trader Joe’s is renowned for its innovative and high-quality offerings, and the mini tacos are no exception. They represent the store’s commitment to providing customers with accessible and enjoyable food experiences. Whether you’re seeking a quick lunch, a party appetizer, or a comforting snack, these mini tacos deliver a satisfying experience. They are a testament to how frozen food can be both convenient and delicious, earning a dedicated following among Trader Joe’s enthusiasts.
What are Trader Joe’s Mini Tacos?
Trader Joe’s Mini Tacos are a frozen appetizer or snack consisting of small, crispy taco shells filled with seasoned ground beef or chicken. They come pre-assembled and frozen, requiring minimal preparation before cooking. Typically, a package contains a generous quantity, making them ideal for sharing or enjoying over multiple sittings.
These mini tacos are designed for quick and easy cooking, with instructions for both oven baking and air frying readily available on the packaging. They are a convenient alternative to making tacos from scratch, offering a similar taste experience with significantly less effort. The filling is flavorful and well-seasoned, providing a satisfying savory bite. They are a popular choice for parties, game nights, or a simple weeknight meal, offering a fun and accessible way to enjoy a classic favorite.
Why are they Popular?
Trader Joe’s Mini Tacos have gained significant popularity due to their incredible convenience and satisfying flavor profile. They offer a quick and easy meal or snack option, perfect for busy individuals and families. The pre-assembled nature eliminates the time-consuming task of preparing individual tacos, making them a go-to choice for weeknights or gatherings.
Social media platforms, particularly TikTok and Instagram, have played a large role in boosting their popularity, with numerous users sharing cooking tips and rave reviews. The air fryer method, specifically, has become a viral sensation, showcasing how easily these mini tacos can achieve a perfectly crispy texture. Their affordability and accessibility, coupled with consistently positive feedback, contribute to their enduring appeal among Trader Joe’s shoppers.
Cooking Methods
Trader Joe’s Mini Tacos can be prepared using several methods, including air frying and oven baking, each offering a slightly different result in texture and time.
Air Fryer Instructions
Utilizing an air fryer is a remarkably efficient way to achieve crispy Trader Joe’s Mini Tacos. Many users report excellent results with this method, noting a significantly quicker cooking time compared to traditional oven baking. The circulating hot air ensures even cooking and a delightful crunch.
Several sources suggest a temperature range between 350°F and 375°F for optimal results. One user found success at 370°F for 7 minutes, while others recommend 350°F for 6-8 minutes. Remember to preheat your air fryer for best results. It’s also crucial to avoid overcrowding the basket; work in batches if necessary to ensure each taco cooks evenly and achieves maximum crispiness. Flipping halfway through the cooking process is often recommended for consistent browning.
Optimal Air Fryer Temperature
Determining the ideal temperature for air frying Trader Joe’s Mini Tacos involves balancing speed and achieving a perfectly crispy texture. While variations exist, a sweet spot appears to be between 350°F and 375°F. Lower temperatures, around 350°F, may require slightly longer cooking times but can prevent burning.
Conversely, 370°F or 375°F will cook the tacos more rapidly, potentially yielding a superior crunch. One user successfully used 370°F, while others suggest 350°F as a reliable starting point. It’s important to consider your specific air fryer model, as temperatures can vary. Experimenting within this range is encouraged to find what works best for your appliance and personal preference regarding crispiness. Consistent monitoring during the initial cook is also advised.
Air Fryer Cooking Time
The optimal cooking time for Trader Joe’s Mini Tacos in an air fryer generally falls between 6 to 9 minutes, but this is heavily influenced by the air fryer’s power and the chosen temperature. A common recommendation is 7-8 minutes at 350°F, ensuring a thorough heat penetration and crispy exterior.
However, at higher temperatures like 370°F or 375°F, the cooking time can be reduced to around 5-7 minutes. One user reported success with 7 minutes at 350°F, while another used 5 minutes at 375°F. Remember to flip the tacos halfway through the cooking process for even browning and crisping. Monitoring closely during the final minutes is crucial to prevent burning, especially with faster cooking times. Adjustments may be needed based on your air fryer.
Flipping the Tacos During Cooking
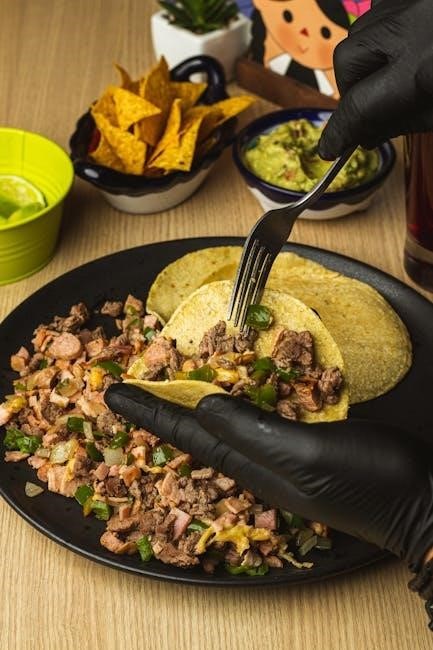
Flipping Trader Joe’s Mini Tacos midway through the cooking process is absolutely essential for achieving optimal crispiness and even heating. This simple step ensures that both sides of the taco shells are exposed to the direct heat of the air fryer or oven, preventing one side from becoming overly browned while the other remains pale and soft.
Typically, you should flip the tacos around the halfway point of the total cooking time. For example, if cooking for 8 minutes, flip them at the 4-minute mark. Use tongs to carefully turn each taco, avoiding breakage. This technique guarantees a uniformly golden-brown and delightfully crunchy texture, elevating the overall enjoyment of these convenient mini tacos. Don’t skip this crucial step!
Oven Baking Instructions
Baking Trader Joe’s Mini Tacos in the oven is a fantastic alternative when an air fryer isn’t available, or for cooking larger batches. This method delivers a reliably crispy result, though it may require slightly longer cooking times compared to air frying. Preparing the baking sheet correctly is key to preventing sticking and ensuring even cooking.
Generally, a temperature of 425°F (218°C) is recommended for optimal baking. The typical oven baking time ranges from 7 to 9 minutes, but always check for desired crispness. Lining your baking sheet with parchment paper is highly advised for easy cleanup and to prevent the tacos from adhering to the surface. Arrange the mini tacos in a single layer, ensuring they aren’t overcrowded for even heat distribution.
Recommended Oven Temperature
When opting to bake Trader Joe’s Mini Tacos in the oven, maintaining the correct temperature is crucial for achieving that desirable crispy texture without burning them. Based on various user experiences and package recommendations, a consistent temperature of 425°F (approximately 218°C) is widely considered ideal.
This temperature strikes a balance, allowing the tacos to cook through thoroughly while simultaneously crisping up the outer shells. Some sources suggest 350°F for a longer cook time, but 425°F generally yields better results in a shorter timeframe. It’s important to preheat your oven to ensure even cooking from the start. Monitoring closely during the baking process is still recommended, as oven variations can occur.
Oven Baking Time

Determining the optimal oven baking time for Trader Joe’s Mini Tacos is key to a perfectly cooked snack. Generally, a baking time of 7 to 9 minutes at 425°F is recommended, though this can vary slightly depending on your oven. Initial reports suggest starting with 7 minutes and checking for desired crispness.
If the tacos aren’t sufficiently golden brown and crispy after 7 minutes, continue baking for an additional 1-2 minutes, carefully monitoring to prevent burning. Some users have found 6-9 minutes sufficient, while others prefer a slightly longer bake. Remember to flip the tacos halfway through the cooking process to ensure even browning and crisping on both sides. Consistent monitoring is vital for optimal results!
Preparing the Baking Sheet
Proper preparation of your baking sheet is crucial for preventing sticking and ensuring even cooking of Trader Joe’s Mini Tacos. While not strictly necessary, lightly greasing the baking sheet with cooking spray is highly recommended. This creates a non-stick surface, allowing the tacos to crisp up beautifully without adhering to the metal.
Alternatively, you can line the baking sheet with parchment paper. This provides an even more effective barrier against sticking and simplifies cleanup. Ensure the tacos are arranged in a single layer on the prepared baking sheet, leaving a small space between each one to promote airflow and even browning. Avoid overcrowding, as this can lead to steaming instead of crisping.
Enhancing the Flavor
Trader Joe’s Mini Tacos are delicious on their own, but adding toppings and dips elevates the experience to a whole new level of flavorful enjoyment!
Adding Toppings
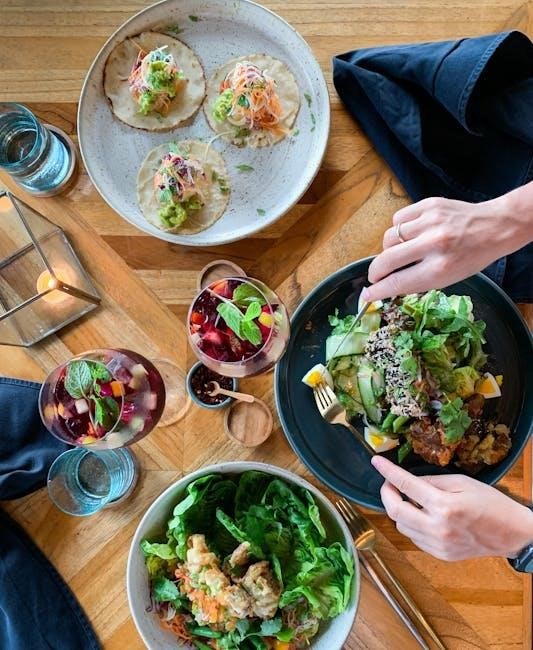
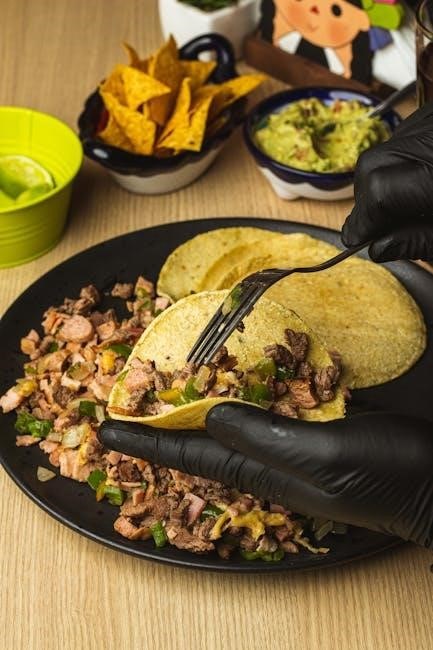
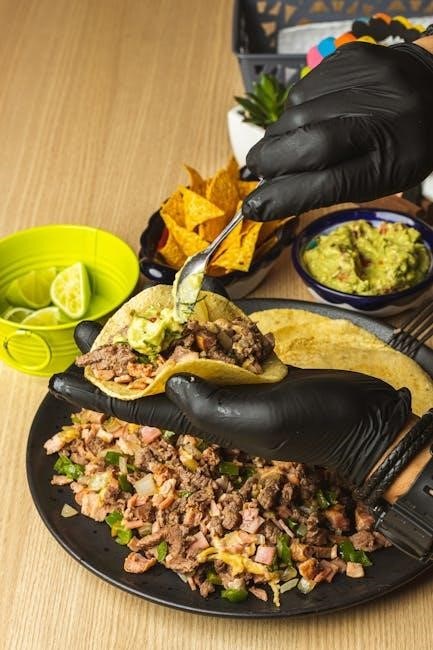
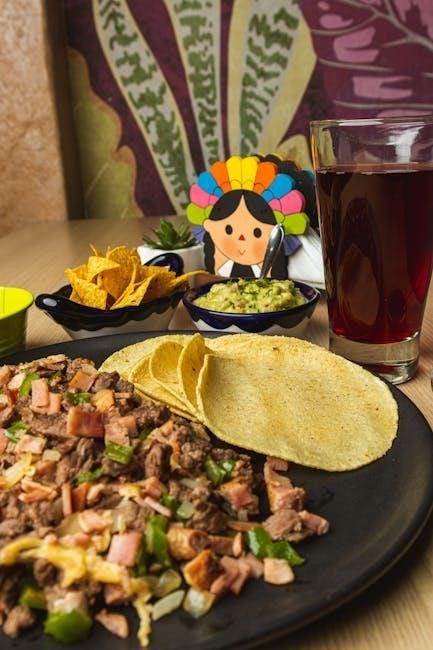
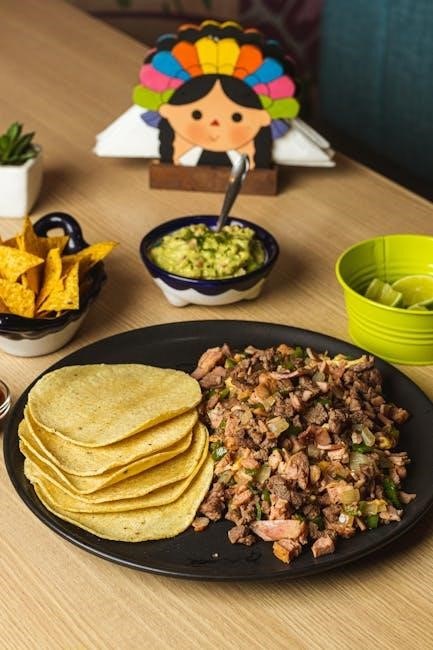
Trader Joe’s Mini Tacos truly shine when customized with your favorite toppings! Consider the possibilities – a sprinkle of shredded cheese, a dollop of sour cream, or a vibrant burst of fresh salsa can transform these little tacos.
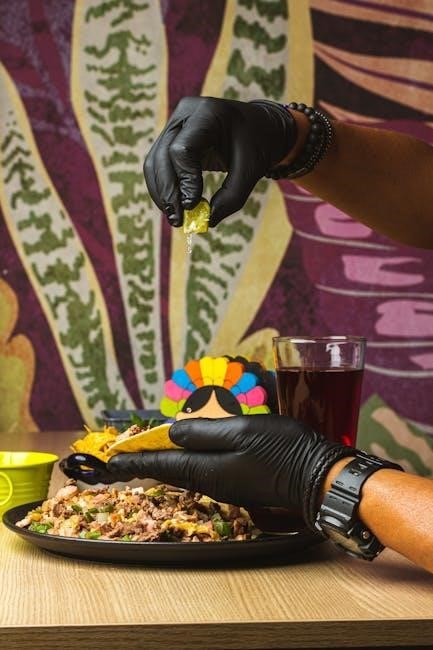
Popular Topping Choices include diced tomatoes, shredded lettuce, chopped onions, and a squeeze of lime juice for a zesty kick. For those who enjoy a bit of heat, a dash of your preferred hot sauce is always a welcome addition.
Homemade Salsa Ideas are endless! Try a classic pico de gallo with tomatoes, onions, cilantro, and jalapeños, or a creamy avocado salsa for a milder flavor. A mango salsa adds a sweet and spicy twist, perfectly complementing the savory taco filling. Don’t be afraid to experiment and create your signature salsa!
Popular Topping Choices
When it comes to elevating your Trader Joe’s Mini Tacos, the topping options are truly limitless! Many taco enthusiasts favor the classic combination of shredded cheddar or Monterey Jack cheese, providing a creamy and comforting element. A generous helping of crisp, shredded lettuce adds a refreshing crunch, while finely diced tomatoes contribute a juicy sweetness.
Chopped white or red onions offer a pungent bite, balanced beautifully by a dollop of cool sour cream or creamy avocado. For those seeking a zesty finish, a squeeze of fresh lime juice brightens the flavors. Don’t underestimate the power of a sprinkle of chopped cilantro for a vibrant, herbaceous note!
Ultimately, the best toppings are those that suit your personal preferences, transforming these mini tacos into a customized culinary delight.
Homemade Salsa Ideas
Take your Trader Joe’s Mini Tacos to the next level with a vibrant, homemade salsa! A classic pico de gallo, featuring diced tomatoes, onions, jalapeños, cilantro, and lime juice, offers a fresh and zesty kick. For a smoky flavor, try a roasted tomato salsa – roasting the tomatoes, onions, and peppers before blending intensifies their sweetness.
A fruity mango salsa, combining diced mangoes, red onion, bell peppers, and a touch of habanero, provides a delightful sweet and spicy contrast. Alternatively, a creamy avocado salsa, blending avocado, lime juice, cilantro, and a hint of garlic, adds a luxurious texture.
Experiment with different chili peppers to control the heat level, and don’t be afraid to add a splash of orange juice for extra brightness. Homemade salsa elevates these mini tacos from good to extraordinary!
Dipping Sauces
Enhance your Trader Joe’s Mini Taco experience with a selection of complementary dipping sauces! Sour cream or Mexican crema provides a cool and tangy counterpoint to the taco’s savory filling. Guacamole, whether store-bought or homemade, adds a creamy, avocado-rich dimension. For those who enjoy a bit of heat, a chipotle mayo, created by blending mayonnaise with chipotle peppers in adobo sauce, is an excellent choice.
A simple lime crema, made by mixing sour cream with lime juice and zest, offers a refreshing zest. Consider a spicy queso dip for a cheesy, flavorful indulgence.
To create your own dip, blend Greek yogurt with taco seasoning and a squeeze of lime for a lighter option. Don’t hesitate to experiment with different flavors to find your perfect pairing!
Recommended Dips
When enjoying Trader Joe’s Mini Tacos, several dips elevate the experience. A classic sour cream is always a winner, providing a cool contrast to the savory filling. Guacamole, readily available at Trader Joe’s, adds a creamy, fresh element. For spice lovers, a vibrant salsa verde or a fiery habanero salsa are fantastic choices.
Trader Joe’s also offers pre-made queso dips, perfect for a cheesy indulgence. A creamy cilantro-lime dressing provides a zesty kick. Consider a simple avocado crema, blending avocado with lime juice and a touch of sour cream.
Don’t overlook the convenience of pre-made pico de gallo for a fresh, chunky dip. Ultimately, the best dip depends on your personal preference – explore and enjoy!
Making Your Own Dip
Creating a homemade dip for your Trader Joe’s Mini Tacos is surprisingly easy and rewarding! A quick guacamole can be made by mashing avocados with lime juice, diced onion, cilantro, and a pinch of salt. For a creamy avocado crema, blend avocado with sour cream, lime juice, and a dash of garlic powder.
A simple salsa involves combining diced tomatoes, onion, jalapeño, cilantro, and lime juice. Experiment with roasted tomatoes for a deeper flavor. A spicy chipotle dip can be crafted by blending chipotle peppers in adobo sauce with mayonnaise and lime juice.
Don’t hesitate to personalize your dip with your favorite spices and herbs. Freshness is key, so use ripe ingredients for the best taste!
Troubleshooting & Tips
Troubleshooting common issues like sogginess or burning ensures perfectly crispy Trader Joe’s Mini Tacos. Adjusting cooking times and temperatures is often the key to success!
Tacos Not Crispy Enough
If your Trader Joe’s Mini Tacos aren’t achieving that desirable crispy texture, several adjustments can be made. First, ensure your air fryer or oven is adequately preheated; a lower initial temperature can lead to steaming instead of crisping. Consider extending the cooking time by a minute or two, closely monitoring to prevent burning.
Another crucial factor is overcrowding. Avoid layering the tacos in the air fryer basket or on the baking sheet, as this restricts airflow and hinders even cooking. A single layer is ideal for optimal crispness. Additionally, a light misting of oil – though not always necessary – can promote browning and enhance the texture. Remember, different air fryers and ovens vary, so experimentation with time and temperature is often required to find the sweet spot for your appliance.
Finally, ensure you’re not using too low of a temperature; 350-400°F generally yields the best results.
Tacos Burning
If you find your Trader Joe’s Mini Tacos are burning before they’re fully heated through, immediate adjustments are necessary. The most common culprit is an excessively high cooking temperature. Reduce the temperature by 25°F increments, checking for improvement after each adjustment. Overcooking is easily done, especially in powerful air fryers.
Another factor could be the cooking time. Begin checking the tacos a minute or two before the recommended time, and adjust accordingly. Pay close attention to visual cues – look for golden brown color rather than dark, charred spots. If using an oven, ensure the rack isn’t positioned too close to the heating element.
Furthermore, some air fryers cook more aggressively than others, so reducing the cooking time is often the best solution. A quick flip halfway through can also help prevent uneven burning.
Cooking Time Adjustments
Adjusting the cooking time for Trader Joe’s Mini Tacos is often necessary to achieve optimal crispiness and internal temperature. Air fryer cooking times typically range from 5 to 8 minutes at 350-375°F, but variations exist based on your specific model. Oven baking generally requires 7-9 minutes at 425°F.
If the tacos aren’t crispy enough, increase the cooking time in 1-minute increments, checking after each addition. Conversely, if they’re browning too quickly, reduce the time. Remember that smaller batches generally cook faster than larger ones.
Consider the initial temperature of the tacos; frozen tacos will require a longer cooking time than those that have partially thawed. Experimentation is key to finding the sweet spot for your appliance and preferences!
Storage of Leftover Tacos
Properly storing leftover Trader Joe’s Mini Tacos is crucial for maintaining their quality and ensuring food safety. Allow the cooked tacos to cool completely before transferring them to an airtight container. This prevents condensation, which can lead to sogginess.
Refrigerate the cooled tacos promptly, ideally within two hours of cooking. They will generally remain fresh and flavorful for up to 3-4 days when stored correctly. For longer-term storage, freezing is an option, though the texture may change slightly upon thawing.
When reheating, the air fryer is recommended to restore some of the original crispiness. Avoid microwaving, as this tends to make them soft. Enjoy your leftover tacos within the recommended timeframe for the best taste!

Nutritional Information
Trader Joe’s Mini Tacos contain approximately 174 calories per serving, with ingredient breakdowns including beef, cheese, and seasonings for a tasty snack!
Calorie Count
Trader Joe’s Mini Tacos offer a convenient, albeit calorie-dense, snack or quick meal option. Understanding the calorie count is crucial for those mindful of their dietary intake. A typical serving size, generally around three to four mini tacos, contains approximately 174 calories. This value can fluctuate slightly depending on the specific variety – beef versus chicken, for example – and any toppings added post-cooking.
It’s important to note that while the tacos themselves contribute a significant portion of calories, the addition of dips, salsa, or sour cream can substantially increase the overall caloric load. For individuals tracking macronutrients, each serving also provides a moderate amount of fat and carbohydrates, alongside a reasonable protein content. Considering portion control and mindful additions can help enjoy these mini tacos as part of a balanced diet.
Ingredient Breakdown
Trader Joe’s Mini Tacos boast a surprisingly extensive ingredient list, reflecting their pre-made convenience. The core components typically include wheat flour tortillas, seasoned ground beef or chicken, and a blend of cheeses. Seasoning mixes contain a variety of spices like chili powder, cumin, and paprika, contributing to their signature flavor. You’ll also find ingredients like modified food starch, dextrose, and various vegetable oils used in processing.
Further examination reveals the presence of hydrolyzed vegetable protein, yeast extract, and natural flavors, enhancing the savory profile. Preservatives like sodium benzoate and potassium sorbate are included to maintain freshness. While convenient, those seeking a cleaner ingredient list might prefer making tacos from scratch. Understanding this breakdown allows informed choices for dietary needs and preferences.