Month: March 2026 (page 1 of 1)

electrolux front load washer manual

Electrolux Front Load Washer Manual: A Comprehensive Guide

Electrolux provides detailed guides for IQ-Touch front-load washers, covering installation, operation, maintenance, and troubleshooting for optimal performance.

Electrolux front load washers represent a commitment to innovative laundry solutions, blending advanced technology with user-friendly design. These machines are engineered to deliver exceptional cleaning performance while prioritizing fabric care and energy efficiency. This comprehensive manual serves as your guide to understanding and maximizing the capabilities of your Electrolux washer.

From the IQ-Touch series to various model configurations, Electrolux offers a range of front load options to suit diverse needs. Key features often include specialized wash cycles, precise temperature control, and robust build quality. Before operation, carefully review the safety instructions and installation guidelines detailed within this guide to ensure proper setup and safe usage.

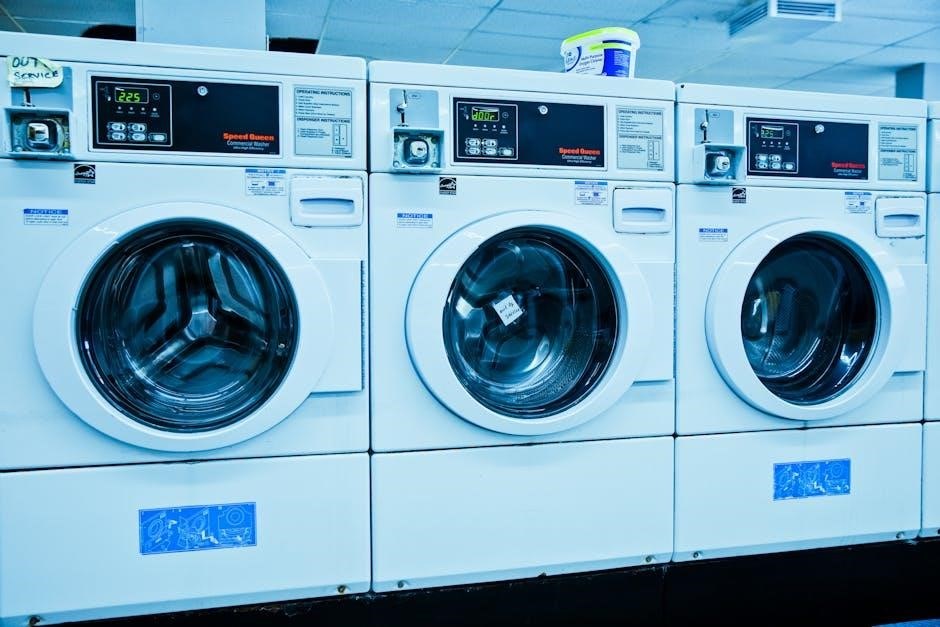
Understanding Your Washer Model Series

Electrolux front load washers are categorized into distinct model series, each offering a unique set of features and capabilities. Identifying your specific model series is crucial for accessing tailored support and understanding its functionalities. The series number, vital for referencing documentation, can be located on the appliance itself – typically on a label inside the door or on the rear panel.

Different series may incorporate varying technologies, such as EcoInverter motors for enhanced energy savings or IQ-Touch controls for intuitive operation. Referencing your model number on the Electrolux website (http://www.electroluxappliances.com) provides access to specific user manuals, parts diagrams, and troubleshooting resources. Understanding these nuances ensures optimal performance and longevity of your appliance.

Safety Instructions and Warnings

Electrolux prioritizes user safety. Before operating your front load washer, carefully read all provided instructions and retain them for future reference. This appliance is not intended for use by individuals with reduced physical, sensory, or mental capabilities without proper supervision or instruction. Children should be supervised to ensure they do not play with the appliance.

Crucially, the washer MUST be properly grounded to prevent electrical shock. Do not attempt to repair the appliance yourself; contact qualified service personnel. Never light any appliance for any reason. Avoid using abrasive cleaning agents, as they can damage the surfaces. Disconnect the power supply before cleaning or performing maintenance.

Important Safety Precautions

To ensure safe operation, always inspect the washer for damage before each use. Do not operate the appliance if the power cord or plug is damaged. Avoid overloading the washer, as this can affect performance and potentially cause damage. Keep the area around the washer clear of flammable materials.

Never attempt to open the door during a wash cycle, as water may be hot and cause burns. Always supervise children near the appliance. Do not insert hands into the drum while it’s rotating. If the appliance malfunctions, immediately disconnect the power and contact Electrolux support. Prioritize safety during installation and maintenance.

Electrical Grounding Requirements

The Electrolux washer MUST be properly grounded to minimize the risk of electric shock. This appliance is designed for use with a standard household electrical outlet. Do not attempt to alter the plug or bypass the grounding feature. Ensure the voltage and frequency of the power supply match the specifications on the appliance’s rating plate.

Never connect the washer to an extension cord or multi-outlet adapter. If a grounding type outlet is not available, consult a qualified electrician for installation. Improper grounding can lead to a hazardous situation. Regularly inspect the power cord for damage and replace it if necessary. Always disconnect power before any maintenance or cleaning.

Installation and Setup

Proper installation involves unpacking, leveling, and connecting the water supply and drain hose, ensuring a secure and efficient operation of your Electrolux washer.

Unpacking and Initial Inspection

Carefully unpack your new Electrolux front load washer, removing all packaging materials, including shipping bolts and foam supports. These are crucial for safe transport and must be removed before operation to prevent damage. Inspect the washer thoroughly for any visible signs of damage incurred during shipping – dents, scratches, or broken parts.

Verify that all included accessories are present, such as the drain hose, water supply hoses, and any provided manuals or documentation. Retain the packaging materials for potential future transport or warranty claims. If any damage is detected, immediately contact the retailer or Electrolux customer support. Do not attempt to operate a damaged appliance.

Positioning and Leveling the Washer

Choose a firm, level floor to position your Electrolux front load washer, capable of supporting its weight when fully loaded. Ensure adequate space around the washer for proper ventilation and access for maintenance. If installing on a plinth or stacking a washer-dryer combination, utilize the specified accessories for stability.

Use a spirit level to check the washer’s levelness. Adjust the leveling feet, located at the bottom corners, until the washer is perfectly balanced. Proper leveling minimizes vibration and noise during operation, extending the appliance’s lifespan. Securely tighten the lock nuts on the leveling feet once the desired level is achieved.

Connecting Water Supply and Drain Hose

Connect the water supply hose to a cold water faucet with a compatible thread size. Ensure the hose is securely tightened to prevent leaks. The drain hose should be positioned into a standpipe or laundry tub, maintaining the correct height as specified in the manual to facilitate proper drainage.

Avoid kinks or sharp bends in both the water supply and drain hoses, as these can restrict water flow. Regularly inspect the connections for leaks and tighten as needed. Proper installation of these hoses is crucial for efficient washer operation and preventing water damage.

Water Supply Connection Details

The Electrolux washer requires a cold water supply connection. Use a new hose set; do not reuse old ones. Ensure the water faucet has a pressure between 20 and 120 psi. Connect the inlet hose to the marked hot and cold water taps, tightening securely by hand, then using pliers for a quarter turn.

Check for leaks immediately after connection. If using a threaded pipe connection, apply Teflon tape to the threads before attaching the hose. Avoid cross-threading to prevent damage. A properly secured water supply is vital for safe and efficient operation.

Drain Hose Installation Guidelines

Proper drain hose installation prevents water damage and ensures efficient wastewater removal. The drain hose must be securely inserted into a standpipe with a diameter of at least 1.97 inches. The standpipe height should be between 30 and 96 inches from the floor.

Avoid excessive bending or kinking of the hose, as this restricts water flow. Ensure the hose is firmly clamped to prevent accidental dislodgement. Never connect the drain hose directly to a garbage disposal; use a dedicated standpipe. Regularly inspect the hose for cracks or leaks.

Operating Instructions

Electrolux washers feature intuitive controls; properly loading laundry and selecting appropriate wash cycles are key for optimal cleaning performance and fabric care.

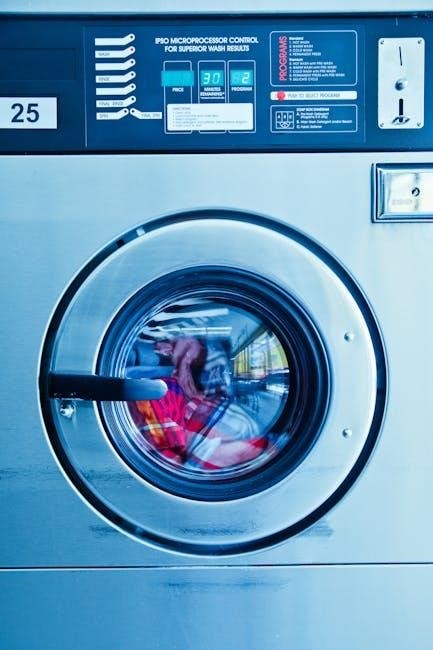
Control Panel Overview

The Electrolux front load washer’s control panel is designed for user-friendly operation. It typically includes a digital display showcasing cycle selections, remaining time, and options. A power button initiates or cancels cycles, while a start/pause button manages operation. Cycle selection dials or touchscreens allow choosing from various wash programs like Normal, Delicates, and Quick Wash.

Option buttons adjust settings such as temperature, spin speed, and extra rinse features. Error codes displayed indicate potential issues requiring attention. The panel’s interface provides clear visual cues for each function, ensuring easy navigation and customization of wash preferences. Familiarizing yourself with these controls unlocks the full potential of your Electrolux washer.

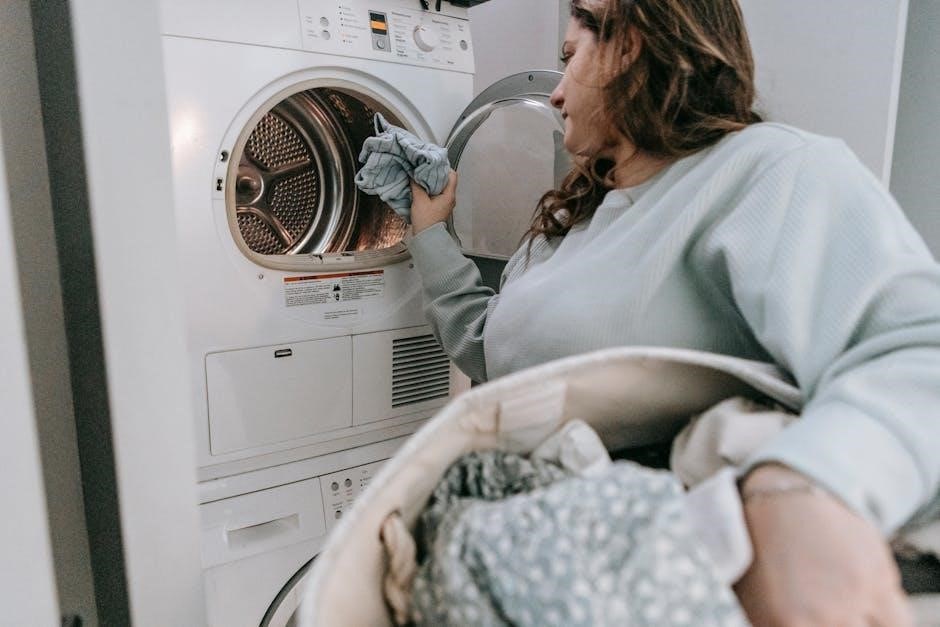
Loading Laundry Properly

To maximize cleaning performance and protect your Electrolux front load washer, proper loading is crucial. Avoid overloading the drum; leave ample space for clothes to move freely. Distribute items evenly to maintain balance during the spin cycle, preventing excessive vibration and noise.

Always check pockets for objects like coins or keys. Delicate items should be placed in a mesh laundry bag to prevent damage. For optimal results, do not tightly pack laundry. Follow the recommended load sizes indicated in the wash cycle guide. Proper loading ensures efficient washing and extends the lifespan of your appliance.

Selecting Wash Cycles

Your Electrolux front load washer offers a variety of wash cycles tailored to different fabric types and soil levels. The Normal/Cotton Cycle is ideal for everyday cotton and linen items. For delicate fabrics like silk or lingerie, choose the Delicates/Hand Wash Cycle, which provides a gentler wash action.

Additional cycles may include options for bulky items, quick wash, or sanitize. Refer to the control panel and user manual for a complete list and descriptions of available cycles. Selecting the appropriate cycle ensures optimal cleaning and fabric care, preserving the quality of your garments.

Normal/Cotton Cycle

The Normal/Cotton Cycle on your Electrolux front load washer is designed for durable, everyday fabrics like cotton, linen, and blends. This cycle utilizes a robust wash action and appropriate water temperature to effectively remove dirt and stains from typically soiled items. It’s perfect for bed sheets, towels, and everyday clothing.

Adjustable options within this cycle allow customization for soil level and spin speed. For heavily soiled items, select a higher soil level. Always check garment care labels before using this cycle to ensure fabric compatibility and prevent damage.

Delicates/Hand Wash Cycle

The Delicates/Hand Wash Cycle is specifically engineered for fragile items requiring gentle care, such as lingerie, silk, lace, and hand-washable garments. This cycle employs a slow wash action and cool water temperatures to minimize stretching, snagging, and fading. It’s ideal for preserving the integrity of delicate fabrics.

Always place delicate items inside a mesh laundry bag for added protection during the wash cycle. Avoid overloading the washer, as this can reduce cleaning effectiveness and increase the risk of damage. Select a low spin speed to further protect delicate fabrics from excessive wrinkling.

Adjusting Wash Options

Electrolux washers offer customizable wash options to tailor each cycle to your specific laundry needs. These options allow for precise control over water temperature, spin speed, and rinse cycles. Adjusting these settings ensures optimal cleaning and fabric care.

Utilize the control panel to modify these settings before starting a wash. Experimenting with different combinations can significantly improve cleaning results and protect your garments. Remember to consider the fabric type and soil level when selecting your preferred options. Proper adjustment maximizes efficiency and extends the life of your clothes.

Temperature Selection

Electrolux front load washers provide a range of water temperature options to suit various fabric types and cleaning needs. Selecting the appropriate temperature is crucial for effective stain removal and preventing damage to your clothes. Options typically include Cold, Warm, and Hot washes.

Cold water is ideal for delicate fabrics and preventing color fading, while warm water is suitable for everyday laundry. Hot water is best for heavily soiled items and sanitizing, but may cause shrinkage. Always check garment care labels before selecting a temperature. Proper temperature selection ensures optimal cleaning and fabric preservation.

Spin Speed Control

Electrolux front load washers offer adjustable spin speeds, allowing you to customize the cycle based on fabric type and desired dryness level. Higher spin speeds extract more water, reducing drying time, but can cause more wrinkles. Lower spin speeds are gentler on delicate items, minimizing damage and wrinkling.

Press the Spin button repeatedly to cycle through available speeds. Options typically range from No Spin to Extra High Spin. For bulky items like towels or jeans, a higher spin speed is recommended. For delicate fabrics, choose a lower spin speed to prevent stretching or damage. Proper spin speed selection optimizes both cleaning and fabric care.

Extra Rinse Option

Electrolux front load washers feature an Extra Rinse option designed to thoroughly remove detergent residue from your laundry. This is particularly beneficial for individuals with sensitive skin or allergies, as residual detergent can cause irritation. Utilizing an extra rinse cycle ensures cleaner, softer clothes and minimizes potential skin reactions.

To activate the Extra Rinse option, locate the corresponding button on the control panel and select it before starting the wash cycle. The washer will automatically add an additional rinse step to the selected program. This feature enhances cleaning performance and provides peace of mind, guaranteeing a truly fresh and residue-free wash.

Maintenance and Cleaning

Regular cleaning of the detergent dispenser, drum, and filter is crucial for maintaining peak performance and extending the lifespan of your Electrolux washer.

Cleaning the Detergent Dispenser

To ensure optimal washing performance, regularly clean the detergent dispenser. Remove the dispenser drawer by pressing the release button or lever, consulting your specific model’s manual for exact location. Rinse the drawer thoroughly under warm water, removing any accumulated detergent residue or fabric softener buildup. Pay close attention to the compartments and any small openings.

For stubborn residue, use a soft brush or cloth. Avoid abrasive cleaners, as they can damage the dispenser. Inspect the dispenser housing within the washer and remove any lingering debris. Ensure all parts are completely dry before reinserting the drawer. A clean dispenser prevents clogs and ensures accurate detergent distribution, contributing to cleaner laundry and a longer-lasting appliance.

Cleaning the Drum

Maintaining a clean washer drum is crucial for preventing odors and ensuring effective cleaning. Regularly run a cleaning cycle using a washer cleaner specifically designed for front load washers, following the product’s instructions. Alternatively, you can use a cup of white vinegar added directly to the drum and run a hot water cycle.

Periodically wipe down the drum’s interior with a damp cloth to remove any visible residue or buildup. Pay attention to the rubber door gasket, cleaning it thoroughly to prevent mold and mildew growth. Leaving the door slightly ajar after each wash aids in ventilation and prevents moisture buildup, contributing to a fresher, cleaner drum.

Cleaning the Filter

The Electrolux washer filter traps lint, debris, and small objects, requiring periodic cleaning to maintain optimal performance. Locate the filter access panel, typically at the front bottom of the machine. Have a towel handy to absorb any spilled water when opening the panel. Carefully unscrew and remove the filter, cleaning it thoroughly under running water to remove all accumulated debris.

Inspect the filter housing for any obstructions and clear them as needed. Reinstall the filter securely, ensuring a watertight seal to prevent leaks. Regularly cleaning the filter—at least every few months—prevents drainage issues and prolongs the life of your washing machine.

Troubleshooting Common Issues

If your Electrolux washer isn’t draining, check the drain hose for kinks or obstructions. A clogged filter is another frequent cause; ensure it’s clean. For a washer that won’t spin, verify the load is balanced and the lid is properly closed. Consult the error codes displayed – the manual details their meanings.

Common error codes indicate specific problems, guiding you toward a solution. If issues persist, refer to the online support resources at electroluxappliances.com. Always disconnect the power before attempting any repairs. Remember safety first, and avoid attempting complex fixes without professional assistance.

Washer Not Draining

If your Electrolux front load washer isn’t draining, first inspect the drain hose for any kinks, bends, or obstructions that might be blocking the water flow. A common culprit is a clogged drain filter – locate and carefully clean it, as debris often accumulates there. Ensure the drain hose isn’t inserted too far into the drainpipe, which can cause siphoning.

Also, verify that the drainpipe isn’t clogged itself. If the problem continues, consult the manual for specific troubleshooting steps related to your model. Disconnect power before inspecting internal components. If unsure, contact a qualified technician.

Washer Not Spinning

If your Electrolux front load washer isn’t spinning, ensure the load is balanced. An unbalanced load can trigger a safety mechanism preventing spin to avoid damage. Check for excessive suds, as they can sometimes interfere with the spinning process; use the appropriate amount of detergent. Verify the lid switch is functioning correctly – the washer won’t spin if it doesn’t detect the door is closed.

Consult your manual for error codes, as these can pinpoint the issue. If the problem persists, a faulty drive motor or belt might be the cause, requiring professional repair. Always disconnect power before any inspection.

Error Codes and Their Meanings

Electrolux front load washers utilize error codes to diagnose issues. These codes, displayed on the control panel, offer valuable insights into the problem. For example, a code indicating a water supply issue suggests checking the inlet hoses and water pressure. Drainage errors signal potential clogs in the drain hose or pump filter.

Refer to your specific model’s manual for a comprehensive list of codes and their corresponding solutions. Ignoring error codes can lead to further damage. Some codes may require professional service, while others can be resolved with simple troubleshooting steps.

Additional Resources

For online support, product information, and warranty details regarding your Electrolux washer, visit http://www.electroluxappliances.com for assistance.

Accessing Online Support and Product Information

Electrolux offers a wealth of resources online to assist you with your front load washer. Visiting http://www.electroluxappliances.com provides access to detailed product manuals, frequently asked questions, and troubleshooting guides. You can also register your appliance for warranty coverage and receive important updates.

The website features helpful videos demonstrating proper usage and maintenance procedures. Should you encounter issues, the online support portal allows you to submit inquiries or connect with a customer service representative. Furthermore, you can find replacement parts and accessories directly through the Electrolux website, ensuring your washer continues to operate at peak efficiency for years to come. Don’t hesitate to utilize these valuable online tools!

Warranty Information

Electrolux front load washers are backed by a comprehensive warranty, protecting against manufacturing defects in materials and workmanship. The specific terms and duration of the warranty vary depending on the model and region, so it’s crucial to review your purchase documentation. Typically, the warranty covers parts and labor for a specified period, often one year for parts and limited lifetime for certain components like the stainless steel drum.

To ensure warranty validity, proper installation and use, as outlined in the manual, are essential. Registering your appliance online at the Electrolux website is highly recommended to streamline any potential claims. Keep your proof of purchase safe, as it will be required for warranty service.

trauma and recovery pdf

Understanding Trauma and Recovery: A Comprehensive Guide

Navigating the complexities of trauma requires accessible resources; numerous PDFs offer guidance on healing journeys․
These documents provide insights into various therapeutic approaches and self-help strategies‚

empowering individuals to begin their recovery process with informed understanding and support․
Exploring these PDFs can be a valuable first step towards reclaiming well-being․

What is Trauma?

Trauma‚ at its core‚ is a deeply distressing or disturbing experience that overwhelms an individual’s ability to cope․ It’s not simply the event itself‚ but the lasting adverse effects on someone’s mental‚ emotional‚ and physical well-being․ Many PDFs dedicated to trauma recovery emphasize this distinction‚ highlighting that trauma’s impact is highly personal and subjective․

These resources often detail how trauma can stem from a single event – like an accident or assault – or from ongoing‚ repeated experiences‚ such as childhood abuse or neglect․ Understanding the source of trauma is crucial for effective healing․ PDFs frequently categorize trauma‚ explaining the differences between acute‚ chronic‚ and complex trauma (C-PTSD)‚ offering tailored approaches for each․

Crucially‚ trauma disrupts the normal functioning of the brain and body‚ leading to a range of symptoms including anxiety‚ depression‚ flashbacks‚ and difficulty regulating emotions․ PDFs often provide self-assessment tools and explain the neurobiological basis of trauma‚ empowering individuals to understand their responses and seek appropriate support․

Types of Trauma

PDF resources on trauma recovery consistently categorize experiences into distinct types‚ aiding in targeted treatment approaches․ Acute trauma stems from a single‚ isolated incident – a car accident‚ natural disaster‚ or witnessing violence․ These PDFs often detail immediate coping strategies and the importance of seeking support post-event․

Chronic trauma‚ conversely‚ results from prolonged or repeated exposure to harmful situations‚ such as ongoing domestic violence or persistent bullying․ PDFs emphasize the cumulative impact of chronic trauma and the need for long-term therapeutic interventions․

Complex Trauma (C-PTSD) arises from sustained‚ pervasive trauma‚ typically experienced in childhood‚ often within the context of relationships․ These PDFs highlight the unique challenges of C-PTSD‚ including difficulties with emotional regulation‚ self-perception‚ and interpersonal relationships․ They often advocate for specialized therapies like Internal Family Systems (IFS) or Somatic Experiencing․ Understanding these distinctions‚ as outlined in numerous recovery PDFs‚ is vital for personalized healing․

Acute Trauma

PDF guides dedicated to acute trauma recovery frequently focus on immediate stabilization and processing of a single‚ distressing event․ These resources emphasize the importance of safety and self-care in the aftermath‚ offering practical exercises for grounding and emotional regulation․ Many downloadable PDFs detail the stages of acute stress‚ from initial shock to potential development of Post-Traumatic Stress Symptoms (PTSS)․

A common theme within these PDFs is the benefit of early intervention‚ often recommending Trauma-Focused Cognitive Behavioral Therapy (TF-CBT) or Eye Movement Desensitization and Reprocessing (EMDR) even shortly after the incident․ They also address common reactions like flashbacks‚ nightmares‚ and hypervigilance‚ providing coping mechanisms and normalizing these experiences․

Furthermore‚ PDFs often include information on seeking professional support‚ differentiating between normal grief responses and signs requiring clinical attention․ Resources emphasize that while acute trauma can be deeply unsettling‚ full recovery is often achievable with appropriate support and targeted interventions‚ as detailed in readily available PDF materials․

Chronic Trauma

PDF resources addressing chronic trauma‚ stemming from prolonged or repeated exposure to distressing events‚ often highlight the insidious nature of its impact․ These guides emphasize that unlike acute trauma‚ chronic trauma’s effects accumulate over time‚ leading to deeply ingrained patterns of coping and belief systems․ Many downloadable PDFs detail the complex interplay between ongoing stress and its physiological consequences‚ such as chronic inflammation and dysregulation of the nervous system․

A key focus within these materials is understanding attachment patterns and the development of insecure attachment styles as a result of prolonged adversity․ They frequently recommend therapeutic approaches like Somatic Experiencing and Internal Family Systems (IFS) to address the fragmented sense of self often experienced by survivors․

PDFs also underscore the importance of building resilience and self-compassion‚ recognizing that healing from chronic trauma is a long-term process requiring patience and self-acceptance․ Resources often include exercises for boundary setting‚ emotional regulation‚ and cultivating a sense of safety within the body‚ all readily accessible in downloadable PDF formats․

Complex Trauma (C-PTSD)

PDF guides dedicated to Complex Post-Traumatic Stress Disorder (C-PTSD) emphasize its distinct characteristics‚ differentiating it from single-incident PTSD․ These resources detail how C-PTSD arises from prolonged‚ repeated trauma – often occurring within relationships involving power imbalances‚ like childhood abuse or domestic violence․ Downloadable PDFs frequently highlight the pervasive sense of helplessness‚ shame‚ and difficulty with emotional regulation common in C-PTSD․

A significant portion of these materials focuses on the impact of C-PTSD on identity and self-perception‚ explaining how survivors may struggle with a fragmented sense of self and difficulty forming healthy relationships․ They often recommend Trauma-Focused Cognitive Behavioral Therapy (TF-CBT) and Internal Family Systems (IFS) as effective therapeutic interventions․

PDFs also provide practical tools for managing symptoms like dissociation‚ emotional flashbacks‚ and difficulties with trust․ They stress the importance of establishing safety‚ building self-compassion‚ and developing healthy coping mechanisms‚ all readily available within these accessible PDF resources․

The Impact of Trauma on the Brain

Numerous PDFs illustrate how trauma fundamentally alters brain structure and function‚ impacting emotional processing and cognitive abilities․ These resources explain how traumatic experiences can lead to heightened activity in the amygdala – the brain’s fear center – resulting in increased anxiety and reactivity․ Simultaneously‚ trauma can impair the hippocampus‚ hindering memory consolidation and leading to fragmented or intrusive recollections․

PDF guides often detail the diminished capacity of the prefrontal cortex – responsible for emotional regulation and rational thought – in trauma survivors․ This can manifest as difficulty controlling impulses‚ making decisions‚ and managing emotions effectively․ Visual aids‚ like brain scans‚ are frequently included to demonstrate these neurological changes․

These downloadable materials emphasize neuroplasticity‚ the brain’s ability to reorganize itself by forming new neural connections․ They highlight how trauma-informed therapies‚ detailed in other PDFs‚ can facilitate healing and restore healthy brain function‚ offering hope for recovery․

Amygdala and the Fear Response

PDF resources dedicated to trauma recovery consistently emphasize the amygdala’s crucial role in the fear response․ These documents explain how‚ during a traumatic event‚ the amygdala rapidly assesses threats‚ triggering the “fight‚ flight‚ or freeze” response․ This system‚ designed for immediate survival‚ becomes hyperactive in trauma survivors‚ leading to exaggerated startle reflexes‚ anxiety‚ and persistent feelings of danger․

Many PDFs illustrate how trauma can “rewire” the amygdala‚ making it overly sensitive and prone to misinterpreting neutral stimuli as threats․ This results in chronic hypervigilance and difficulty distinguishing between past trauma and present safety․ Diagrams often depict the amygdala’s connections to other brain regions‚ showcasing its influence on emotional and behavioral reactions․

These guides detail therapeutic techniques‚ like those described in other PDFs‚ aimed at regulating amygdala activity․ Techniques such as mindfulness and EMDR are presented as methods to help individuals process traumatic memories and reduce the amygdala’s reactivity‚ fostering a sense of safety and control․

Hippocampus and Memory Processing

Trauma recovery PDFs frequently address the hippocampus’s vital function in memory formation and contextualization․ They explain how traumatic experiences can disrupt the hippocampus’s ability to process memories effectively‚ leading to fragmented‚ disorganized‚ and often sensory-based recollections․ Unlike typical autobiographical memories‚ trauma memories may lack a clear sense of time and place․

These resources illustrate how the hippocampus‚ when overwhelmed by intense fear‚ struggles to integrate traumatic events into a coherent narrative․ This can result in intrusive flashbacks‚ nightmares‚ and a sense of reliving the trauma as if it were happening in the present moment․ PDFs often depict the hippocampus’s role in distinguishing between safe and dangerous contexts․

Therapeutic approaches detailed in these PDFs‚ such as TF-CBT and EMDR‚ aim to help individuals reprocess traumatic memories and strengthen hippocampal functioning․ By creating a coherent narrative and integrating the trauma into their life story‚ survivors can reduce the intensity of intrusive symptoms and regain a sense of control․

Prefrontal Cortex and Emotional Regulation

Trauma recovery PDFs consistently highlight the prefrontal cortex (PFC)’s crucial role in emotional regulation‚ impulse control‚ and executive functions․ They explain how trauma can significantly impair PFC activity‚ leading to difficulties in managing intense emotions‚ making rational decisions‚ and maintaining a sense of self-control․ This impairment often manifests as heightened reactivity‚ impulsivity‚ and difficulty with planning․

These resources detail how chronic stress and trauma can physically alter the PFC‚ reducing its size and functionality․ Consequently‚ individuals may struggle to regulate their emotional responses‚ leading to outbursts‚ anxiety‚ depression‚ and difficulty forming healthy relationships․ PDFs often emphasize the link between PFC dysfunction and dissociation․

Therapeutic interventions outlined in these PDFs‚ like Somatic Experiencing and IFS‚ focus on restoring PFC function by promoting self-awareness‚ emotional processing‚ and the development of coping mechanisms․ By strengthening the PFC‚ survivors can regain control over their emotional responses and build resilience․

Paths to Recovery: Therapeutic Approaches

PDF guides detail diverse therapies—TF-CBT‚ EMDR‚ Somatic Experiencing‚ and IFS— offering pathways to healing․
These approaches address trauma’s impact‚ fostering resilience and emotional well-being through specialized techniques and support․

Trauma-Focused Cognitive Behavioral Therapy (TF-CBT)

TF-CBT‚ extensively detailed in numerous downloadable PDF resources‚ is a highly structured‚ evidence-based treatment specifically designed for children and adolescents (and adaptable for adults) impacted by trauma․ These PDFs often outline the core components: Psychoeducation‚ which normalizes trauma responses; Relaxation skills to manage anxiety; Cognitive processing‚ challenging unhelpful thoughts; and Trauma narrative development‚ safely recounting the traumatic event․

PDF guides emphasize TF-CBT’s phased approach: establishing safety and stabilization‚ processing traumatic memories‚ and integrating the experience․ Many resources provide worksheets and exercises for both therapists and clients․ They highlight the importance of involving caregivers or supportive adults in the process‚ particularly for younger individuals․

Furthermore‚ PDFs clarify that TF-CBT isn’t simply recounting the trauma; it’s about changing the way the trauma is remembered and its impact on current functioning․ These materials often include case examples and practical tips for implementation‚ making it a readily accessible therapeutic modality for those seeking information and support․

Eye Movement Desensitization and Reprocessing (EMDR)

EMDR therapy‚ frequently explained in comprehensive PDF guides‚ is a structured psychotherapy approach designed to alleviate the distress associated with traumatic memories․ These PDFs detail the eight phases of EMDR: History taking‚ preparation‚ assessment‚ desensitization‚ installation‚ body scan‚ closure‚ and reevaluation․ A core component involves bilateral stimulation – typically eye movements‚ but also tactile or auditory stimulation – while the client focuses on the traumatic memory․

PDF resources clarify that EMDR doesn’t involve rewriting the memory‚ but rather reprocessing it to reduce its emotional charge․ They emphasize the adaptive information processing (AIP) model‚ suggesting trauma disrupts the brain’s natural healing process․ EMDR aims to restore this process․

Many downloadable PDFs address common misconceptions about EMDR‚ assuring readers it’s not about reliving the trauma‚ but about accessing and reprocessing it safely․ They also highlight the importance of working with a trained and certified EMDR therapist․ These guides often include self-assessment tools and information on finding qualified practitioners․

Somatic Experiencing

Somatic Experiencing (SE)‚ detailed in numerous trauma recovery PDFs‚ is a body-oriented therapeutic approach that focuses on releasing trapped trauma energy․ Unlike talk therapy‚ SE emphasizes the felt sense – the physical sensations associated with traumatic memories – as a pathway to healing․ PDFs explain that trauma often becomes “stuck” in the nervous system‚ leading to chronic physical and emotional symptoms․

These resources highlight SE’s core principle: that animals instinctively regulate their nervous systems to discharge threat energy‚ but humans often suppress this response during trauma․ SE aims to gently titrate the nervous system‚ allowing the body to complete its natural defensive responses – fight‚ flight‚ or freeze – in a safe and controlled environment․

PDF guides often include exercises and explanations of SE techniques‚ such as pendulation (moving between sensations of safety and distress) and tracking sensations․ They emphasize the importance of a skilled SE practitioner to guide the process and ensure safety․ Many PDFs also address how SE differs from exposure therapy and why it can be particularly helpful for individuals who struggle with verbal processing of trauma․

Internal Family Systems (IFS)

Internal Family Systems (IFS)‚ frequently explained in trauma recovery PDFs‚ proposes that the mind is comprised of various “parts” – each with its own unique perspective‚ feelings‚ and motivations․ These parts aren’t pathological‚ but rather represent different aspects of our inner world‚ developed in response to life experiences‚ including trauma․ PDFs detail how trauma can create “exiled” parts carrying pain and vulnerability‚ which are then protected by “manager” and “firefighter” parts․

Resources emphasize that IFS isn’t about eliminating parts‚ but about understanding and accepting them․ Manager parts attempt to control emotions and situations to prevent further pain‚ while firefighter parts react impulsively to overwhelm․ The goal is to access the “Self” – a core of wisdom‚ compassion‚ and calm – to heal the wounded parts․

PDF guides often provide exercises for identifying and relating to different parts‚ fostering self-compassion and inner harmony․ They explain how IFS can help resolve internal conflicts and address the root causes of trauma-related symptoms․ Many resources highlight IFS’s non-pathologizing approach‚ making it accessible and empowering for survivors․

Resources for Support and Information (PDF Focus)

Numerous downloadable PDFs offer trauma-informed guidance‚ providing accessible support for survivors․ These resources cover therapeutic techniques‚ self-care strategies‚ and pathways to healing‚
empowering individuals on their recovery journey․

Finding Trauma Recovery PDFs Online

Locating reliable trauma recovery resources in PDF format requires a strategic approach․ A simple online search using keywords like “trauma recovery workbook PDF‚” “C-PTSD self-help PDF‚” or “EMDR exercises PDF” will yield numerous results․ However‚ not all sources are created equal․ Government websites‚ such as those of the Substance Abuse and Mental Health Services Administration (SAMHSA)‚ often provide evidence-based PDFs․

University counseling centers and mental health organizations frequently offer downloadable guides and worksheets․ Look for PDFs from reputable institutions like the National Center for PTSD․ Additionally‚ professional organizations dedicated to specific therapies‚ like EMDR International Association‚ may have resource lists including downloadable materials․ Be cautious of blogs or websites with unclear authorship or lacking professional oversight․ Utilizing academic databases and library resources can also uncover scholarly articles available as PDFs‚ offering in-depth information on trauma and recovery․

Evaluating the Credibility of PDF Resources

When utilizing trauma recovery PDFs‚ critical evaluation is paramount․ Prioritize resources authored by qualified mental health professionals – psychologists‚ psychiatrists‚ licensed therapists – with demonstrable expertise in trauma-informed care․ Look for credentials and affiliations listed clearly on the document or associated website․ Scrutinize the publication date; information evolves‚ and older PDFs may contain outdated practices․ Resources published within the last five to ten years are generally more reliable․

Assess the source’s reputation․ PDFs from established organizations (SAMHSA‚ National Center for PTSD) or academic institutions carry more weight than those from unknown websites․ Be wary of PDFs promoting unproven or “miracle cure” approaches․ Cross-reference information with other reputable sources to verify accuracy․ Look for evidence-based practices grounded in research‚ not solely anecdotal evidence․ A credible PDF will cite its sources and offer a balanced perspective‚ acknowledging the complexities of trauma recovery․

Author Qualifications

Determining the author’s qualifications is crucial when assessing trauma recovery PDFs․ Look beyond simply identifying a name; delve into their professional background․ Ideally‚ the author should possess a graduate degree in a mental health field – psychology‚ counseling‚ social work – and hold relevant licenses or certifications․ Experience specializing in trauma-informed care is essential; general mental health training isn’t sufficient․

Investigate their affiliations․ Are they associated with reputable organizations‚ universities‚ or trauma centers? This lends credibility to their expertise․ Search for the author online to verify their credentials and identify any potential biases or conflicts of interest․ Be cautious of authors promoting specific therapies without acknowledging alternative approaches․ A qualified author will demonstrate a nuanced understanding of trauma‚ acknowledging its diverse presentations and the need for individualized treatment plans․ Look for transparency regarding their theoretical orientation and clinical experience․

Publication Date & Source

The publication date and source of a trauma recovery PDF are vital indicators of its reliability․ Trauma research and therapeutic approaches evolve rapidly; information from over five years ago may be outdated or reflect superseded understandings․ Prioritize PDFs published within the last few years to ensure alignment with current best practices․

Scrutinize the source․ Is it a reputable organization – a government agency‚ a well-known mental health association‚ a respected academic institution? Avoid PDFs originating from unknown websites or individuals with unclear affiliations․ Look for sources that cite evidence-based research and adhere to ethical guidelines․ Peer-reviewed publications are generally more trustworthy than self-published materials․ Check if the source has a clear editorial process and a commitment to accuracy․ A credible source will readily provide contact information and transparency regarding its funding and mission․

Recommended PDF Resources for Trauma Survivors

Identifying trustworthy PDF resources requires careful consideration‚ but several organizations offer valuable materials․ The National Center for PTSD (U․S․ Department of Veterans Affairs) provides comprehensive guides on understanding and managing trauma‚ available for free download․ These PDFs cover a range of topics‚ including specific trauma types‚ treatment options‚ and self-care strategies․

Additionally‚ the Substance Abuse and Mental Health Services Administration (SAMHSA) offers resources on trauma-informed care and recovery․ Look for PDFs detailing Trauma-Focused Cognitive Behavioral Therapy (TF-CBT) and other evidence-based practices․ Sidran Institute offers resources focused on complex trauma and dissociation․ Remember to always evaluate the publication date and source‚ as detailed previously‚ to ensure the information remains current and reliable․ Prioritize resources created by qualified professionals and organizations dedicated to mental health support․

cata jewelcrafting guide

Cata Jewelcrafting Guide: An Overview

Cataclysm Jewelcrafting offers lucrative opportunities, focusing on gem cutting and jewelry creation․ Housing costs vary greatly by location, impacting potential profits for crafters․

Cataclysm’s jewelcrafting revamp introduces significant changes, demanding adaptation from players․ The profession centers around cutting gems and crafting jewelry, heavily influenced by economic factors like housing prices in cities such as Roanoke and Portland․ Understanding these regional cost-of-living indices – Roanoke at 86․5, Portland much higher – is crucial․ Jewelcrafting provides income potential, but success relies on market awareness and efficient resource management, considering median incomes in places like Gainesville, Florida․

The Benefits of Jewelcrafting in Cataclysm

Jewelcrafting in Cataclysm offers substantial benefits, including creating powerful gems for gear optimization․ Players can generate income through crafting and auction house sales, influenced by housing market data from cities like Lincoln, Nebraska․ Lower poverty rates in Newnan, Georgia, suggest a stable economy․ Mastering the profession provides self-sufficiency and contributes to raid progression, while understanding regional economic indicators aids profitability․

Gathering Professions for Jewelcrafting

Mining is crucial for Jewelcrafting, providing ores to prospect for gems․ Regional housing prices, like those in Roanoke, Virginia, don’t directly impact gathering․

Mining as a Primary Source

Mining stands as the foundational gathering skill for any aspiring Cata Jewelcrafter․ It provides the raw ores – Saronite, Titanium, and even rarer deposits – essential for prospecting․ Successful jewelcrafting heavily relies on consistent ore acquisition, making mining a profitable pairing․ While cities like Portland, Oregon, showcase high housing costs, this doesn’t diminish the need for readily available ore․ Efficient mining routes and knowledge of node locations are paramount, ensuring a steady supply for gem cutting and crafting lucrative jewelry pieces․

Prospecting for Rare Gems

Prospecting transforms mined ores into potentially valuable gems, a core element of Cata Jewelcrafting․ Success isn’t guaranteed; ore yields vary, demanding patience and volume․ Locations like Roanoke, Virginia, with lower housing costs, offer a stable base for operations․ Higher-level ores yield rarer gems, crucial for epic jewelry․ Understanding prospecting chances and utilizing perks to increase yields are vital for maximizing profits and crafting sought-after items․

Jewelcrafting Specializations

Specialization in Meta-Gem cutting or gem color allows jewelcrafters to focus expertise, impacting crafting efficiency and market dominance within Cataclysm․

Meta-Gem Cutting

Meta-Gem cutting is a crucial specialization, allowing jewelcrafters to socket powerful gems into jewelry pieces․ These gems provide significant stat boosts, enhancing character performance in raids and PvP․ Proficiency in this area requires careful resource management and understanding of current market demands, as prices fluctuate based on raid tier progression and class needs․ Mastering meta-gem cutting offers substantial profit potential, especially with rare gem sources and efficient prospecting techniques․ Successful jewelcrafters adapt to patch changes and optimize their crafting for maximum returns․

Gem Color Specialization

Gem color specialization allows jewelcrafters to focus on cutting specific gem types – ruby, sapphire, or emerald – gaining proficiency bonuses․ This impacts crafting speed and yield, increasing efficiency and reducing material waste․ Choosing a specialization depends on market trends and demand for particular gem colors, influenced by class needs and raid compositions․ Understanding regional economic factors, like housing costs in Roanoke or Portland, can inform specialization choices for optimal profitability․

Crafting Gems

Gem crafting involves cutting raw materials into usable gems, utilizing recipes and prospecting skills․ Market values, like those in Newnan, Georgia, dictate profitability․

Basic Gem Cutting Recipes

Early Jewelcrafting focuses on simple gem cuts like Quickstones, Delicate Dreamstones, and Hardy Azerothian Diamonds․ These require minimal skill and readily available materials from mining or the Auction House․ Success relies on understanding regional economic factors, such as Roanoke’s housing prices, to gauge player spending․ Mastering these basics provides a foundation for crafting more valuable gems, and understanding market trends is crucial for maximizing profits, mirroring the cost of living indices in cities like Lincoln, Nebraska․

Rare and Epic Gem Creation

Advanced Jewelcrafting unlocks recipes for rare and epic gems like Dragon’s Eyes and Everbright Firestones, demanding higher skill levels and rarer materials․ Prospecting becomes vital, alongside careful Auction House monitoring, influenced by factors like Gainesville’s median income․ These gems fetch significantly higher prices, but competition is fierce․ Understanding regional economic data, such as Newnan, Georgia’s cost of living, aids in pricing strategies and maximizing profitability․

Crafting Jewelry

Jewelcrafting allows creating rings and necklaces, utilizing cut gems․ Daily quests provide additional materials and opportunities to refine crafting skills and profits․

Necklaces and Rings

Jewelcrafting in Cataclysm centers on crafting powerful necklaces and rings, essential for end-game character optimization․ These items utilize a variety of cut gems, influencing stats like critical strike, haste, and mastery․ The value of crafted jewelry fluctuates based on gem prices and demand, mirroring housing market trends․ Locations like Roanoke and Portland demonstrate diverse economic landscapes, impacting player purchasing power and, consequently, jewelcrafting profitability․ Understanding these economic factors is crucial for maximizing returns on crafted items․

Jewelcrafting Daily Quests

Daily quests provide a consistent source of income and experience for Cataclysm jewelcrafters․ These quests typically involve crafting specific gems or jewelry for NPCs, rewarding gold and reputation with factions like the Kirik Stonecutters․ Like the varying incomes in cities like Gainesville and Lincoln, quest rewards contribute to a crafter’s overall financial stability․ Completing these quests daily is vital for progression and funding further crafting endeavors, mirroring consistent housing costs․

Jewelcrafting Gems for Different Classes

Optimizing gems for DPS, tanking, and healing roles is crucial in Cataclysm․ Like varied housing prices, gem choices significantly impact character performance․

Gems for DPS Classes

Damage-per-second classes in Cataclysm benefit immensely from gems prioritizing critical strike chance and haste․ These stats directly amplify damage output, crucial for raid encounters and challenging content․ Consider gems like Bold Dragon’s Eye for critical strike, and Quick Dragon’s Eye for haste․

Similar to fluctuating housing markets, gem prices shift with demand․ Prioritize socketing all available gear slots to maximize DPS gains, mirroring the diverse housing options available across different cities․

Gems for Tanking Classes

Tanking in Cataclysm demands survivability, making gems focused on stamina and defense paramount․ Robust Dragon’s Eye gems significantly increase health, while Iron Dragon’s Eye boosts armor․ Prioritize these stats to mitigate incoming damage and maintain threat effectively․

Like the varied cost of living across locations, tanking gem choices depend on specific encounter needs․ Consistent threat generation is vital, mirroring the stability desired in housing investments․

Gems for Healing Classes

Healers in Cataclysm prioritize spell power and mana regeneration to sustain raid groups․ Focusing on gems like Dreadstone increases spell power, directly boosting healing output․ Eternal Life gems provide a crucial boost to mana, preventing resource exhaustion during prolonged encounters․

Similar to fluctuating housing prices, optimal gem choices depend on healing specialization and encounter length, ensuring efficient mana usage and effective raid support․

Meta-Gem Choices and Optimization

Meta-gems significantly enhance character stats; selecting the correct one, like Chaotic Soul, is vital for maximizing DPS or healing based on your role․

Choosing the Right Meta-Gem

Selecting a meta-gem demands careful consideration of your class and specialization․ For DPS classes, the Chaotic Soul is often preferred, boosting critical strike chance․ Tanking benefits from the Titanic Strength, increasing attack power․ Healers frequently opt for the Insightful Serpent, enhancing spell power and mana regeneration․

Consider your raid composition and encounter types; some fights may favor one stat over another․ Analyzing current market prices in Roanoke, Portland, or Lincoln can also influence your choice, balancing effectiveness with affordability․

Optimizing Meta-Gem Slots

Maximizing meta-gem effectiveness requires understanding socket bonuses․ Prioritize gear with multiple gem slots to fully utilize your meta-gem’s potential․ Consider the cost of living in areas like Newnan, Georgia, when budgeting for gem upgrades․

Stacking stat bonuses from gems and gear is crucial․ Remember that Gainesville, Florida, has a lower median income, potentially impacting your ability to acquire expensive gems quickly․ Efficient optimization leads to significant performance gains in raids and dungeons․

Jewelcrafting Reputation Rewards

Reputation with Kirik Stonecutter and Sons of Hodir unlocks unique patterns and gems, aiding progression․ Housing prices in Lincoln, Nebraska, are stable․

Kirik Stonecutter Reputation

Gaining reputation with the Kirik Stonecutter in the Storm Peaks is crucial for Jewelcrafters․ Daily quests offer substantial reputation gains, alongside prospecting ores found throughout Northrend․ Reaching exalted unlocks access to unique gem recipes, including the highly sought-after Dragon’s Eye gems․ These gems provide significant stat boosts, making them valuable on the auction house․ Remember, Roanoke, Virginia, has a median housing price of $263,845, influencing potential crafting funds․

Sons of Hodir Reputation

Building reputation with the Sons of Hodir in Storm Peaks unlocks essential Jewelcrafting recipes․ Daily quests and completing achievements contribute to faster progress․ Exalted status grants access to the Frostweave Sapphire, a powerful gem for stat optimization․ Consider Gainesville, Florida’s median income of $46,165 when evaluating gem pricing․ Efficient farming and quest completion are key, mirroring the cost of living in Lincoln, Nebraska at 84․2․

Advanced Jewelcrafting Techniques

Mastering gem enhancement and understanding market trends are crucial․ Roanoke’s housing prices at $263,845 demonstrate regional economic factors impacting crafting profitability․

Gem Enhancement Techniques

Advanced jewelcrafting involves maximizing gem potential through careful enhancement․ While basic cutting creates gems, techniques like applying polishing compounds and utilizing specific catalysts can significantly boost stats․ Considering regional economic data, like Newnan, Georgia’s cost of living index of 98․9, informs pricing strategies․ Understanding median household incomes, such as Gainesville, Florida’s $46,165, helps gauge player spending power․ Successful enhancement requires experimentation and knowledge of gem properties, ultimately increasing item value and profitability within the Cataclysm economy․

Using Jewelcrafting to Fund Your Account

Jewelcrafting provides substantial gold-making potential in Cataclysm․ Analyzing housing market data – Roanoke’s mean price of $263,845 versus Portland’s $618,563 – illustrates regional wealth disparities․ Crafting and selling high-demand gems and jewelry generates consistent income․ Utilizing daily quests and prospecting rare gems further boosts profits․ Smart auction house strategies, informed by cost of living indices like Lincoln’s 84․2, ensure competitive pricing and maximize revenue, effectively funding character progression․

Market Strategies for Jewelcrafters

Successful jewelcrafting requires identifying profitable gems, monitoring auction house trends, and adapting to fluctuating regional economies like Newnan, Georgia’s cost of living․

Identifying Profitable Gems

Determining gem profitability in Cataclysm necessitates careful market analysis․ Consider regional economic factors; for example, Gainesville, Florida’s income levels might influence demand for higher-end gems․ Track auction house prices diligently, noting fluctuations based on raid progression and class needs․ Rare gems consistently outperform basic cuts, but require prospecting skill․ Monitor material costs – mining yields impact supply and, consequently, gem pricing․ Understanding these dynamics, alongside cost of living indices like Roanoke’s, is crucial for maximizing profits․

Auction House Tips and Tricks

Mastering the Auction House requires strategic timing and undercut awareness․ List gems during peak raid times to capitalize on demand, mirroring Newnan, Georgia’s near-average cost of living’s impact on disposable income․ Utilize auctioneer addons to track competitor pricing and automate undercut strategies․ Consider bulk listing to attract buyers, but avoid flooding the market․ Research regional economies – Lincoln, Nebraska’s housing costs suggest differing spending habits․ Patience and consistent monitoring are key to maximizing returns․

Jewelcrafting and Raid Progression

End-game content demands optimized gems; Roanoke’s housing market reflects player investment in characters․ Adapting to patch changes is crucial for maintaining gear relevance․

Gems for End-Game Content

For raiding in Cataclysm, maximizing gear stats is paramount․ Epic gems, sourced through prospecting and dungeon drops, become essential․ DPS classes prioritize gems boosting critical strike and haste, while tanks focus on stamina and defense․ Healers need intellect and spirit to sustain mana during prolonged encounters․

Considering locations like Portland, Oregon, with higher costs of living, players may prioritize efficient gold farming through jewelcrafting to fund gem upgrades․ Careful gem selection directly impacts raid performance and survivability․

Keeping Up with Patch Changes

Cataclysm’s development involved frequent patches altering gem values and crafting recipes․ Jewelcrafters must actively monitor official forums and websites like Wowhead for updates․ Changes to class balance often necessitate gem re-evaluation, impacting optimal stat priorities․

Understanding cost of living indices, like those for Roanoke, Virginia, helps gauge player spending habits and adjust gem pricing accordingly․ Adapting quickly to patch changes maximizes profits and maintains a competitive edge in the auction house․

Rare Gem Sources and Farming Locations

Rare gems are found in specific mining nodes, dungeons, and raids․ Locations like those near Newnan, Georgia, may yield valuable resources for jewelcrafting․

Specific Mining Nodes

Targeting specific nodes is crucial for rare gem acquisition․ Rich Titanium Veins in Mount Hyjal and Uldum frequently yield gems․ Prospecting these veins offers a higher chance of obtaining valuable stones compared to common nodes․ Consider areas around Roanoke, Virginia, for analogous resource density, though the gems differ․ Focusing on zones with higher player traffic can also increase competition, but potentially yield faster results due to increased node respawn rates․ Remember to utilize mining skill bonuses and tools for optimal efficiency․

Dungeon and Raid Drops

Dungeons and raids provide alternative sources for rare gems, supplementing mining efforts․ Blackrock Caverns, Throne of the Tides, and Firelands often drop gems upon boss defeat․ While drop rates are lower than prospecting, they offer unique gems unavailable elsewhere․ Similar to housing price fluctuations in cities like Portland, Oregon, drop rates can vary․ Farming these instances consistently, especially on multiple difficulties, increases acquisition chances, offering a valuable, though less predictable, gem supply․

Leveling Jewelcrafting Quickly

Rapid leveling involves focusing on basic gem cutting, utilizing guild perks for skill boosts, and consistently crafting to maximize experience gains efficiently․

Efficient Leveling Paths

To swiftly advance in Cataclysm Jewelcrafting, prioritize crafting the lowest-cost gems available at each skill level․ Continuously prospect ores – mining provides materials and leveling opportunities․ Focus on volume over expensive cuts initially․ Daily quests offer substantial experience gains, supplementing crafting․ Remember that locations like Roanoke, Gainesville, and Lincoln offer diverse economic landscapes, but don’t directly impact leveling speed; efficient crafting is key․ Avoid getting bogged down in rare gem attempts early on, as they are resource-intensive and yield limited experience․

Utilizing Guild Perks

A guild with relevant perks significantly accelerates Jewelcrafting progression․ Look for guilds offering increased skill gains in crafting professions, reducing material costs, or providing access to rare recipes․ Considering the varied housing costs in areas like Portland or Newnan, guild benefits can offset expenses․ Perks boosting mining yield are also valuable, ensuring a steady gem supply․ Prioritize guilds actively supporting crafters, fostering a collaborative environment for recipe sharing and material trading․

Comparing Cata Jewelcrafting to Other Expansions

Cataclysm’s Jewelcrafting saw significant changes from Wrath, introducing new gems and meta-gem options, preparing players for the challenges of Mists of Pandaria․

Changes from Wrath of the Lich King

Cataclysm dramatically altered Jewelcrafting from its Wrath iteration․ The introduction of new gem types, like Dragon’s Eyes and Twilight Diamonds, replaced older systems․ Prospecting became more vital, offering chances for rare finds․ Daily quests provided consistent skill gains and rewards․ Meta-gem slots were adjusted, demanding strategic choices for optimization․ Furthermore, the profession’s economic role shifted, influenced by fluctuating material costs and regional housing market variations, like those seen in Roanoke and Portland․

Preparation for Mists of Pandaria

Transitioning to Mists of Pandaria requires stockpiling Cataclysm gems, anticipating initial demand․ Focus on maximizing Kirik Stonecutter and Sons of Hodir reputations for early access to Pandaria recipes․ Understanding regional economic data, like Gainesville’s income levels, informs pricing strategies․ Efficiently utilize Jewelcrafting to fund account needs, considering fluctuating costs, mirroring housing price variations in cities like Lincoln and Newnan, ensuring a smooth expansion start․

Troubleshooting Common Jewelcrafting Issues

Recipe acquisition can be problematic; material shortages occur․ Monitoring auction house trends, like housing costs in Roanoke, aids in resolving these challenges efficiently․

Recipe Acquisition Problems

Securing Cata Jewelcrafting recipes often proves challenging, relying heavily on reputation gains with factions like Kirik Stonecutter and Sons of Hodir․ Daily quests become essential, alongside diligent exploration for hidden caches․ Some recipes drop randomly from dungeon and raid bosses, mirroring the unpredictable nature of housing market fluctuations in cities like Portland, Oregon․ Patience and consistent effort are key, as relying solely on the Auction House can be prohibitively expensive, especially for rare gem creation formulas․ Remember to check community forums for shared discoveries!

Material Shortages

Cata Jewelcrafting frequently suffers from material scarcity, particularly with rare gems and prospecting reagents․ Mining becomes crucial, but competition for nodes is fierce, mirroring the competitive housing market in Roanoke, Virginia․ Auction House prices surge during shortages, demanding savvy market awareness․ Diversifying sourcing – including daily quests and dungeon runs – mitigates risk․ Consider alternative crafting paths if key materials are unavailable, adapting like incomes in Gainesville, Florida․

Resources for Cata Jewelcrafting

Online databases and community forums provide essential guides, recipes, and market analysis for maximizing profits, similar to cost of living indices․

Useful Websites and Databases

Several online resources are invaluable for Cataclysm Jewelcrafters․ Websites detailing housing market data, like those showcasing Roanoke or Portland prices, demonstrate data accessibility․ Similarly, dedicated World of Warcraft databases meticulously catalog gem recipes, cut costs, and daily quest information․

Wowhead and Allakhazam are excellent starting points, offering user-submitted guides and comments․ These platforms, much like those tracking Gainesville income, provide community-driven insights into profitable gem combinations and market trends, aiding in informed crafting decisions․

Community Forums and Guides

Engaging with the World of Warcraft community is crucial for success in Cataclysm Jewelcrafting․ Forums, mirroring the detailed profiles of cities like Lincoln, Nebraska, offer localized market insights․ Players share tips on gem prospecting, efficient leveling paths, and profitable auction house strategies․

Dedicated guide writers often compile comprehensive resources, similar to cost of living indexes for Newnan, Georgia․ These guides detail optimal gem choices for various classes and raid content, maximizing your crafting potential and income․

i pilot remote instructions

i-Pilot Remote Instructions: A Comprehensive Guide (Updated 03/06/2026)

Today’s date is 03/06/2026 09:31:45. This guide details pairing procedures, navigating the interface, and utilizing core functionalities of your i-Pilot remote system.

The i-Pilot remote system represents a significant advancement in boating control, offering anglers and boaters unprecedented precision and convenience. This system seamlessly integrates with compatible Minn Kota trolling motors, transforming the boating experience. It allows for effortless navigation, precise boat positioning, and intuitive control over various motor functions.

At its core, the i-Pilot system is designed for simplicity and reliability. The remote itself features a user-friendly interface, making it easy to learn and operate, even for those new to advanced boating technology. Key features include Spot-Lock, which holds your boat in place with incredible accuracy, and the ability to create and follow pre-programmed routes.

Understanding the capabilities of your i-Pilot remote is crucial for maximizing your time on the water. This guide will provide a comprehensive overview of the system, from initial setup and pairing to advanced features and troubleshooting tips, ensuring a smooth and enjoyable boating experience.

Understanding i-Pilot and i-Pilot Link

i-Pilot and i-Pilot Link represent Minn Kota’s evolution in remote trolling motor control. i-Pilot, the original system, provides core functionalities like Spot-Lock, route creation, and speed control via a dedicated remote. It establishes a direct connection between the remote and the trolling motor.

i-Pilot Link builds upon this foundation, adding smartphone connectivity through the Minn Kota Connect app. This allows users to control the motor, monitor battery life, and access advanced features directly from their mobile devices. i-Pilot Link remotes can also pair with the app for a redundant control option.

The key difference lies in the added versatility of i-Pilot Link. While both systems offer exceptional precision and convenience, i-Pilot Link expands control options and provides real-time data access, enhancing the overall boating experience. Both systems require initial pairing to function correctly.

Key Features and Benefits of i-Pilot Remotes

i-Pilot remotes unlock a suite of features designed to elevate your boating experience. Spot-Lock, a cornerstone feature, holds your boat in place with GPS precision, ideal for fishing or pausing for activities. Route creation and waypoint marking allow for automated navigation, returning you to favored locations effortlessly.

Beyond navigation, i-Pilot offers precise speed control, ensuring optimal trolling speeds for various fishing techniques. The intuitive interface, navigated with up/down and OK (check mark) buttons, simplifies operation. Remote control eliminates the need to physically steer, freeing you to focus on angling or enjoying the water.

Benefits include increased efficiency, reduced fatigue, and enhanced fishing success. i-Pilot empowers boaters with unparalleled control and convenience, transforming on-water experiences.

Initial Setup and Pairing

Successfully connecting your i-Pilot remote is crucial. This section guides you through first-time pairing, manual connections, and troubleshooting potential issues for seamless operation.

First-Time Pairing Procedure

The initial pairing process establishes communication between your i-Pilot remote and compatible Minn Kota trolling motor. Begin by ensuring your trolling motor is powered on, but not actively engaged in any functions like Spot-Lock or route following. Next, turn on the i-Pilot remote by pressing and holding the Home button until the screen illuminates, indicating it’s ready for pairing.

The remote will automatically begin searching for a compatible motor. If a motor is detected, the screen will display pairing options. Select your motor from the list presented. If the motor doesn’t appear, verify it’s within range and powered on. Follow the on-screen prompts, which may involve confirming a unique identification code displayed on both the remote and the motor’s control board (if accessible). Successful pairing is confirmed by a message on the remote screen.

Manually Pairing an i-Pilot Remote

If automatic pairing fails, manual pairing offers a reliable alternative to connect your i-Pilot remote to your Minn Kota trolling motor. First, use the menu (up/down) buttons to navigate to the System Menu on your i-Pilot remote. Confirm your selection by pressing the OK (check mark) button. Within the System Menu, locate and select the “Pair Remote” option.

The remote will initiate a search for nearby motors. Ensure your trolling motor is powered on. If prompted, enter any displayed pairing code from the motor’s control board onto the remote using the directional buttons and confirm with the OK button. The remote will then attempt to establish a connection. A successful pairing will be indicated by a confirmation message on the remote’s display, signifying a stable link.

Pairing i-Pilot Link Remotes

i-Pilot Link remotes offer enhanced connectivity and features, requiring a slightly different pairing process. Begin by turning on the i-Pilot remote by pressing and holding the Home button until the screen illuminates. Navigate to the System Menu utilizing the menu (up/down) buttons, and select it with the OK (check mark) button.

Within the System Menu, choose the “Pair i-Pilot Link Remote” option. The remote will scan for compatible i-Pilot Link motors. Ensure your motor is powered on and in pairing mode (consult your motor’s manual for specific instructions). Once detected, select your motor from the list displayed on the remote. Confirm the pairing when prompted, and a successful connection will be indicated on the remote’s screen.

Troubleshooting Pairing Issues

If you encounter difficulties pairing your i-Pilot remote, several steps can resolve the issue. First, ensure both the remote and the motor have sufficient battery power. Interference from other electronic devices can disrupt the pairing process; move away from potential sources. Confirm the motor is in pairing mode – refer to your motor’s manual for specific instructions.

Try restarting both the remote and the motor. If pairing repeatedly fails, attempt a factory reset of the remote (consult the full manual for reset procedures). Ensure you are within a reasonable proximity to the motor during pairing. If problems persist, contact Minn Kota customer support for further assistance, providing details about your motor and remote model.

Navigating the i-Pilot Remote Interface

The i-Pilot interface is intuitive. Access the System Menu using the up/down buttons, then select it with the OK (check mark) button for control.

Understanding the Home Screen

The i-Pilot remote’s Home Screen serves as your central hub for accessing all features and functionalities. Upon powering on the remote by holding the Home button, the screen illuminates, displaying crucial information at a glance. This initial view typically showcases your current speed, battery level of both the remote and the trolling motor, and the active mode – whether it’s Spot-Lock, Route Following, or manual steering.

Icons along the bottom of the screen provide quick access to primary functions. These icons are intuitively designed, allowing for easy navigation even in bright sunlight. The Home Screen also displays signal strength, indicating the connection quality between the remote and the trolling motor. A strong, consistent signal is vital for reliable operation. Familiarizing yourself with the Home Screen layout will significantly enhance your overall i-Pilot experience, enabling efficient control and monitoring of your trolling motor.

Using the Menu Buttons (Up/Down)

The Up and Down menu buttons on your i-Pilot remote are essential for navigating the system’s various settings and options. These buttons allow you to scroll through lists, adjust parameters, and select different features within the user interface. Pressing the Up or Down button highlights the desired menu item on the screen, making it ready for selection.

These buttons are particularly crucial when accessing the System Menu. As detailed in pairing instructions, use the Up/Down buttons to locate the System Menu from the Home Screen, then confirm your selection with the OK button. Beyond the System Menu, these buttons are used extensively throughout all i-Pilot settings, including customizing Spot-Lock parameters, route creation, and adjusting speed limits. Mastering the use of these buttons is fundamental to unlocking the full potential of your i-Pilot remote.

The OK (Check Mark) Button Functionality

The OK button, visually represented by a check mark on your i-Pilot remote, serves as the primary selection and confirmation tool within the system. After navigating to a desired menu item or setting using the Up/Down buttons, pressing the OK button confirms your choice and initiates the corresponding action. This button is absolutely critical for making changes and executing commands.

For instance, when pairing your remote – whether for the first time or manually – you’ll utilize the OK button to select options presented on the screen. Similarly, after locating the System Menu using the Up/Down buttons, the OK button confirms access. It’s the final step in many processes, solidifying your input and ensuring the i-Pilot system responds accordingly. Understanding its function is key to seamless operation.

System Menu Overview and Access

The System Menu on your i-Pilot remote is the central hub for configuring advanced settings, performing updates, and managing overall system functionality. Accessing this menu is straightforward, yet crucial for optimizing your boating experience. To reach the System Menu, begin by turning on your i-Pilot remote by pressing and holding the Home button until the screen illuminates.

Once the home screen is visible, utilize the Up/Down menu buttons to scroll through the available options. Continue scrolling until “System Menu” is highlighted on the display. Finally, press the OK (check mark) button to select and enter the System Menu. Within, you’ll find options for pairing, software updates, and various customizable settings. Familiarize yourself with this menu for full control.

Core Functionality & Operation

Mastering i-Pilot means utilizing Spot-Lock, route following, and precise speed/steering control for an enhanced and intuitive boating experience on the water.

Spot-Lock System: Activation and Usage

The Spot-Lock system is a revolutionary feature of the i-Pilot remote, allowing you to hold your boat’s position electronically. To activate, navigate to the Spot-Lock icon on the remote’s interface and press the OK (check mark) button. The system will then engage, utilizing GPS technology to maintain your location, even in wind and current.

You can adjust the Spot-Lock radius to fine-tune the area within which your boat will remain anchored. A smaller radius provides greater precision, while a larger radius allows for more movement. Remember to monitor your surroundings and be aware of potential hazards while using Spot-Lock. Deactivate Spot-Lock by pressing the OK button again, or by briefly pressing the foot pedal (if equipped). Proper usage ensures a safe and convenient boating experience.

Following Routes and Waypoints

The i-Pilot remote enables effortless route following and waypoint navigation, enhancing your on-water experience. To begin, create or import routes and waypoints using compatible software or the Humminbird Fishfinder. Transfer this data to your i-Pilot system. Access the Routes/Waypoints menu on the remote using the up/down buttons, then select it with the OK (check mark) button.

Select your desired route or waypoint from the list. The i-Pilot will automatically steer your boat along the chosen path, maintaining a consistent speed. You can adjust the speed using the speed control buttons on the remote. Monitor the progress on the remote’s display and make adjustments as needed. This feature is ideal for fishing patterns or exploring new areas efficiently.

Controlling Speed and Steering

Precise speed and steering control are fundamental to the i-Pilot remote’s functionality. The remote features intuitive controls for adjusting both aspects of boat movement. Utilize the dedicated speed control buttons – typically up and down arrows – to incrementally increase or decrease your boat’s speed. The current speed is clearly displayed on the remote’s screen.

Steering is managed via the directional pad or joystick on the remote. Gentle movements provide subtle course corrections, while more deliberate inputs result in sharper turns. The i-Pilot system responds instantly to your commands, ensuring responsive handling. Remember to anticipate turns and adjust speed accordingly for optimal control and a smooth ride. Practice in open water to become familiar with the responsiveness.

Advanced Features and Settings

Explore customization options, software updates, and battery management within the i-Pilot remote’s settings. These features enhance performance and longevity.

Customizing i-Pilot Settings

The i-Pilot remote allows for extensive personalization to tailor the experience to your specific boating needs. Access the System Menu via the Home screen, navigating with the Up/Down buttons and confirming selections with the OK (check mark) button. Within the System Menu, you’ll find options to adjust speed limits, steering responsiveness, and Spot-Lock behavior.

Customize units of measurement (miles per hour, kilometers per hour, knots), configure the display brightness, and set preferred language options. Explore advanced settings to fine-tune autopilot functionality and route following parameters. Remember to save any changes made to ensure they are retained. Regularly reviewing and adjusting these settings will optimize your i-Pilot remote’s performance and ensure a seamless boating experience. Experiment with different configurations to discover what works best for your style!

Software Updates and Maintenance

Maintaining your i-Pilot remote with current software is crucial for optimal performance and access to the latest features. Check for updates regularly through the System Menu, accessible using the Up/Down and OK (check mark) buttons from the Home screen. Updates are typically delivered wirelessly when a connection to the i-Pilot Link system is established.

Before initiating an update, ensure the remote has sufficient battery charge. Interrupting the update process can cause system errors. After updating, verify the successful installation within the System Menu. For routine maintenance, clean the screen with a soft, damp cloth. Avoid harsh chemicals or abrasive cleaners. Store the remote in a dry, safe location when not in use to protect it from damage and prolong its lifespan.

Battery Management and Charging

Proper battery management is essential for reliable i-Pilot remote operation. The remote utilizes a rechargeable battery; monitor the battery level indicator on the Home Screen to avoid unexpected power loss during use. When the battery is low, connect the remote to the provided charging cable and a suitable USB power source.

Charging times vary, but a full charge typically takes several hours. Avoid overcharging the battery, as this can reduce its lifespan. It’s recommended to fully charge the remote before each outing. Store the remote in a cool, dry place when not in use, and avoid exposing it to extreme temperatures. Regularly check the battery’s health through the System Menu for optimal performance.