Overview of Residence Certificate
A residence certificate is an official letter from Thai Immigration confirming your registered address. It is required for banks, driving licences, and property purchases. The document costs THB 500 and is issued in one to three business days, sometimes same day. Applicants need a passport and proof of address.
What Is a Residence Certificate?
A residence certificate is a formal letter issued by the Thai Immigration Bureau that verifies an individual’s current registered address in Thailand. It is not an immigration status document; rather, it serves as an official proof of residence that can be presented to banks, motor‑vehicle authorities, real‑estate agencies, and other governmental bodies that require confirmation of where a person lives. The certificate is typically requested by foreigners who hold a valid visa or residence permit and who need to open a bank account, apply for a Thai driving licence, register a vehicle, or purchase property. The document is issued in a single page format and contains the applicant’s full name, passport number, visa type, and the address that has been registered with the immigration office. The Thai Immigration Bureau issues the certificate upon receipt of the completed application form, a copy of the passport, a copy of the visa or residence permit, and a proof of address such as a recent utility bill or lease agreement. The fee for the certificate is THB 500, payable in cash or by bank transfer, and the processing time is normally between one and three business days, although some offices offer same‑day service for an additional surcharge. It is important to note that the residence certificate does not grant any right to stay in Thailand; it is purely an address‑verification letter. Foreigners on short‑stay visas or tourists are generally ineligible to obtain one, as the certificate is intended for those who are legally residing in the country under a valid visa or permit. Applicants should ensure that the address listed matches the one on their visa or residence permit to avoid delays. The certificate is valid indefinitely once issued, but it is advisable to update it if the address changes within a short period to maintain accurate records.
Where It Is Issued (Thai Immigration Bureau)
The residence certificate is issued solely by the Thai Immigration Bureau, the government agency that manages the entry, stay, and exit of foreign nationals in Thailand. Every immigration office—whether the central office in Bangkok or one of the 15 regional offices scattered across the country—has the legal authority to process applications, verify documents, and print the certificate on the official Immigration Bureau letterhead. Applicants must go to the immigration office that corresponds to their registered address; the central office in Bangkok handles special cases that require additional scrutiny, while regional offices handle routine applications. The offices are open from 8:30 a.m. to 4:30 p.m., Monday through Friday, except for public holidays. To obtain the certificate, applicants must bring the completed application form (available as a PDF on the Immigration Bureau’s website), a photocopy of their passport, a copy of their current visa or residence permit, and a proof of address such as a recent utility bill, lease agreement, or a bank statement. The immigration officer will verify the documents, cross‑check the address against the immigration database, and then issue the certificate on the spot. The certificate is printed on official stationery, stamped with the agency’s seal, and signed by a licensed immigration officer, making it a legally binding document. It is valid indefinitely once issued, but it is advisable to re‑apply if the applicant’s address changes within a short period to keep records accurate. The issuance process is standardized across all offices, ensuring consistency in format, security features, and legal validity throughout Thailand. Additionally, the certificate can be requested by appointment through the Immigration Bureau’s online portal, which can reduce waiting time at the office. The certificate is not a residence permit; it merely confirms the applicant’s registered address and does not grant any right to stay in Thailand. Therefore, it is essential that the address listed matches the one on the applicant’s visa or residence permit to avoid delays or rejections. The certificate includes the applicant’s full name, passport number, visa type, and the exact address, along with the issuance date and the immigration office code, ensuring that the document can be verified by any Thai institution that requires proof of residence.

Application Process
Applicants download the PDF form from the Immigration Bureau website, fill in personal details, attach passport and address proof, then submit in person at the nearest immigration office. Officers verify documents and issue the certificate on the same day if all is correct.

Downloading and Completing the Application Form (PDF Reference)
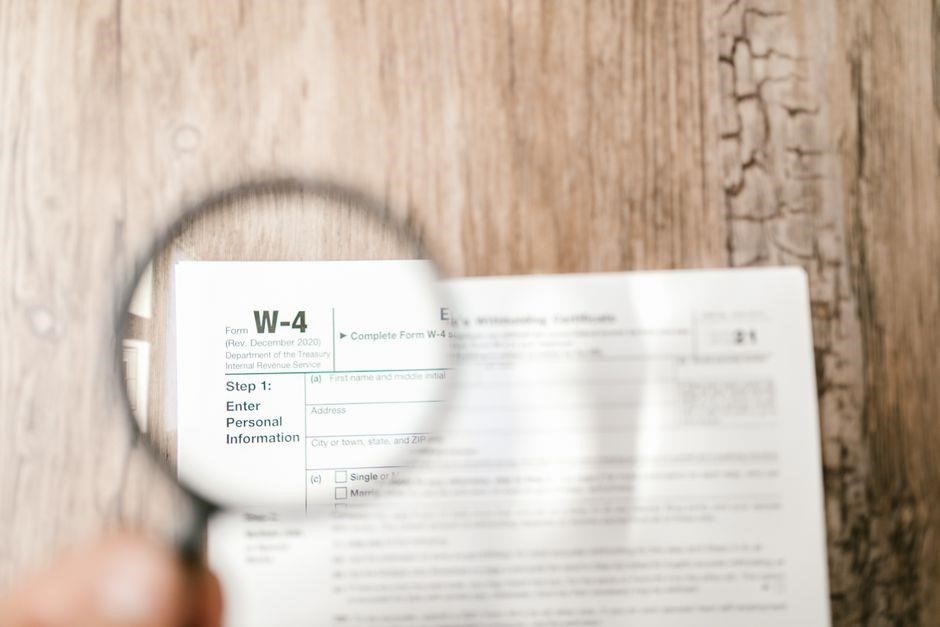
To access the PDF, log onto the Immigration Bureau’s website at https://ltr.boi.go.th. On the homepage, navigate to the “Forms” section and select “Residence Certificate” from the dropdown menu. The PDF is typically 2.5 MB, so a stable internet connection is recommended. Once downloaded, open the file with Adobe Acrobat Reader or any compatible viewer. If you prefer to complete the form digitally, enable the form fields by selecting “Fill & Sign” in Acrobat; otherwise, print the page and use a blue ballpoint pen for handwritten entries. The form is structured into sections: personal details, address verification, purpose of certificate, and signature. Each field is clearly labeled, and mandatory fields are marked in red. After filling, review all entries for accuracy, as errors can delay issuance. Save a copy of the completed PDF to your device for future reference. When you proceed to the immigration office, bring the original printed form, your passport, and a recent utility bill or lease contract that lists your name and address. The office staff will scan the form, verify the documents, and process the application. If you have a valid Thai visa, attach a copy of the visa page; for students, a copy of the student ID card is also accepted. Some offices allow you to submit the form via email; however, the official policy requires in‑person submission for the initial application. Once the form is processed, you will receive a stamped copy of the certificate; keep this in a safe place, as it is required for future transactions such as renewing a Thai driving licence or applying for a new bank account.
Before printing, double‑check the PDF’s version number displayed at the bottom of the document; Immigration Bureau updates the form annually, and using an outdated version can result in rejection. If you are in a hurry, many offices offer a pre‑filled version that you can download from the same portal; this version includes pre‑printed fields for your name and passport number, reducing manual entry time. After printing, use a sharp, blue ballpoint pen—red ink is not accepted—to fill in the fields. When signing, ensure your signature matches the one on your passport; a mismatch may trigger a manual review. If you have a Thai visa, attach a photocopy of the visa page; for students, a copy of the student ID card is also accepted. Some offices allow you to submit the form via email; however, the official policy requires in‑person submission for the initial application. Once the form is processed, you will receive a stamped copy of the certificate; keep this in a safe place, as it is required for future transactions such as renewing a Thai driving licence or applying for a new bank account.
After you obtain the certificate, keep it in a waterproof envelope; the seal may crack if exposed to moisture. If you travel abroad, carry a photocopy in your luggage, but the original must be presented upon return to Thailand for any official transaction. The certificate’s validity is tied to your current address; if you move, you must apply for a new certificate within 30 days of the change. Failure to do so may result in penalties or denial of services such as renewing a Thai driving licence or opening a new bank account. Remember to renew your residence certificate before it expires, as many banks and government agencies will refuse to process documents without a current, valid certificate. Keep the certificate in a safe place and check its expiry date regularly. This small step ensures smooth banking and legal transactions. Stay compliant, stay stress‑free. All good! Enjoy Thailand! Safe travels! Cheers! Bye! Thanks! See ya!.
Submitting the Form at the Immigration Office
After completing the PDF, bring the printed form, passport, visa copy, and a recent utility bill to the nearest Thai Immigration Bureau office. Arrive early to avoid long queues; most offices open at 8:30 a.m. and close at 4:30 p.m. The front desk will verify your identity, scan the form, and confirm the supporting documents. If all is in order, the staff will stamp the application and assign a reference number. Payment of the THB 500 fee is required at this stage; accepted methods include cash, credit card, or mobile payment via the Immigration Bureau’s official app. Keep the receipt—some offices issue a digital copy that can be emailed. Once processed, the certificate is typically issued within one to three business days; in high‑traffic periods, it may take longer. However, select offices offer a same‑day service for an additional fee. If you need the certificate urgently, request the “express” option and provide proof of the urgent need, such as a bank account opening deadline. The staff will guide you on the exact steps for the express service, which often requires a separate application form. After receiving the certificate, sign the back of the document to confirm receipt. Store the original in a safe place; the certificate is required for banking, driving licence renewal, and property transactions. If you move, you must apply for a new certificate within 30 days of the address change. Failure to do so may result in penalties or denial of services. Always keep a photocopy in your travel bag for safety. The Immigration Bureau also offers an online tracking system where you can enter your reference number to check the status of your application. This feature is particularly useful if you are abroad and cannot visit the office. Remember to check the office’s operating hours and any holiday closures before you go. The Immigration Bureau’s official website provides a list of all regional offices and their contact details. By following these steps, you can ensure a smooth submission process and receive your residence certificate promptly. If you encounter any issues, the staff will provide guidance and may ask for additional documents such as a recent bank statement or a letter from your employer confirming your residence. After receipt, you can also request a digital copy via the Immigration Bureau’s portal, which can be useful for online banking applications. The certificate is valid for 90 days from the date of issuance; after that, you must renew it if you still reside at the same address. If you are a student, the university may provide a letter of residence that can be used in lieu of a utility bill, but the Immigration Bureau will still require a copy of the student ID. Some offices allow you to pre‑book an appointment online, which can reduce waiting time. When paying the fee, keep the receipt as proof; if you lose it, you may need to request a duplicate from the office.

Documentation Requirements
Applicants must present a valid passport, a copy of their visa or residence permit, and proof of current address such as a recent utility bill or lease agreement. These documents verify identity and residency for the certificate. Keep copies for future reference submit.

Passport and Visa or Residence Permit Copy
To obtain a residence certificate, you must submit a clear, photocopy of your valid passport, including the personal data page and the visa or residence permit page. The passport copy should show the holder’s full name, nationality, date of birth, and passport number. The visa or residence permit copy must display the type of permit, its issue and expiry dates, and the holder’s current status in Thailand. Photocopies should be in color, with all information legible and no blurring. If the visa is a multiple‑entry tourist visa, it is not accepted; only a valid work, education, or long‑stay visa, or a residence permit, qualifies. The documents must be scanned or printed on high‑quality paper, and the copy must be signed by the applicant or notarized if required by the immigration office. The passport and visa copies are the primary proof of identity and legal residency, and any discrepancy or missing information can delay the certificate issuance. Keep the originals safe, as they are required for verification during the application process. The immigration office will verify the authenticity of the documents before issuing the residence certificate. Failure to provide accurate copies may result in rejection or a request for additional documentation, extending the processing time. Therefore, double‑check that all pages are included, that the dates are current, and that the copies are clear before submission. Confirm all details before submission. All documents must be in language e.
Proof of Current Address (Utility Bill, Lease, etc.)
When applying for a residence certificate, Thai Immigration requires a recent, official document that confirms your present residential address. Acceptable proofs include a utility bill (electricity, water, gas, or internet), a signed lease agreement, a bank statement with a mailing address, or a property tax receipt. The document must be dated within the last three months to ensure it reflects your current domicile. It should display your full name, the exact street address, and the name of the service provider or landlord. Photocopies are acceptable, but they must be in color and legible; any smudges or missing information can trigger a request for additional evidence and delay processing. If you are a tenant, a lease signed by both you and the landlord, with the landlord’s signature and stamp, is preferred. For homeowners, a property tax receipt or a recent utility bill in your name suffices. The address must match the one you intend to use for the certificate; mismatches can result in rejection. It is advisable to keep the original document safe, as the immigration office may verify authenticity on the spot. Some offices allow uploading a scanned copy via their online portal, but a hard copy is still required for final approval. Ensure the document shows the full address, including sub‑unit number if applicable, and that the date is recent. This step is crucial for the certificate’s validity across banks, driving licences, and property transactions. Applicants should keep a digital backup to expedite future renewals or verifications now

Fees and Processing Time
Fee: THB 500. Processing takes 1‑3 business days, with some offices offering same‑day service Available at most now for quick turnaround. Payment accepted via cash or bank transfer at the immigration office. Applicants receive the certificate immediately upon completion.
Application Fee and Payment Methods
The Thai Immigration Bureau charges a flat fee of 500 Thai baht for each residence certificate issued. The fee covers the administrative cost of verifying your address and printing the official letter. Payment can be made in several convenient ways depending on the office’s facilities. Most immigration offices accept cash in Thai baht, which is the simplest and fastest method. For those who prefer electronic transactions, many locations now accept bank transfer the or credit card payment through the Immigration Bureau’s online portal. When paying by bank transfer the applicant must provide the reference number on the receipt to ensure the correct allocation of funds. Credit card payments are processed through a secure gateway and the applicant receives a printed receipt with the transaction ID. In addition, some offices offer the option to pay via mobile payment apps such as PromptPay, which is linked to the applicant’s bank account. It is important to confirm the accepted payment methods at the specific immigration office before submitting the application, as not all locations support every payment type. Failure to pay the correct fee or using an unsupported method will result in a delayed or rejected application. Once payment is confirmed, the applicant receives a receipt that serves as proof of payment and is required for the certificate issuance. The total cost remains 500 baht regardless of payment method chosen, ensuring transparency and fairness for all applicants. Applicants should keep receipt for future reference, as it may be required for subsequent administrative processes or when renewing their residence status. If no receipt appears within 24 hours, contact office
Typical Processing Duration and Same-Day Options
Once the application fee is paid and the completed form is submitted, the Immigration Bureau typically processes the residence certificate within one to three business days. The processing time can vary slightly depending on the volume of applications and the specific office’s workload. Applicants who need the certificate urgently can request same‑day service at most major immigration offices, provided the application is complete and all supporting documents are in order. To qualify for same‑day processing, the applicant must arrive early, usually before 10 a.m., and present the original passport, the signed application form, and a recent utility bill or lease agreement as proof of address. Some offices offer a “priority” slot for an additional fee, which guarantees issuance before the end of the business day. If the application is incomplete or if additional verification is required, the processing time may extend to five business days. Applicants are advised to keep the receipt and any reference number issued at the time of payment, as this will be needed to track the status of the certificate. The Immigration Bureau’s online portal allows applicants to check the progress by entering the reference number, ensuring transparency and reducing the need for in‑person follow‑ups. In summary, while the standard processing window is one to three days, same‑day issuance is available under specific conditions and for an extra fee, making it convenient for those who need the certificate promptly. Applicants can also track progress online using the reference number, ensuring timely receipt of the certificate and avoiding office visits today?!

Usage and Limitations
Use this certificate for bank accounts, driving licences, vehicle registration, and property purchases. It confirms your Thai address but does not grant residency rights. Tourists and short‑stay visitors cannot obtain it; only those with valid visas may apply. The certificate is valid for 90 days. Must renew
Common Uses (Bank Accounts, Driving License, Property Purchase)
Foreign nationals residing in Thailand often need a residence certificate to satisfy local institutions that require proof of address. The most frequent applications are opening a Thai bank account, where the certificate serves as the primary document confirming the applicant’s registered Thai address. Similarly, when applying for a Thai driving licence, the certificate is mandatory to verify that the applicant lives within the country, and it is also used by vehicle registration offices to confirm the owner’s address before issuing licence plates. For real estate transactions, buyers must present the certificate to prove their residency status, which is a prerequisite for many banks and property developers when processing mortgage loans or finalizing sales agreements. The certificate is also accepted by government agencies for various administrative processes, such as registering a company, applying for a local tax ID, or enrolling children in schools. Because the certificate is an official letter from the Immigration Bureau, it carries the same weight as a lease or utility bill in most Thai institutions. However, it does not grant any immigration status; it merely verifies the address. The document is valid for 90 days from the issuance date, after which a new certificate must be requested if the address changes or the expiry approaches. In addition, the certificate can be used by investors to comply with regulations when setting up a business, as licensing bodies require proof of residence to ensure the principal owner is present in Thailand.
Differences from a Residence Permit and Eligibility Restrictions
A residence certificate is an address‑verification letter issued by Thai Immigration. It does not grant any immigration status, nor does it allow indefinite stay. In contrast, a residence permit (or permanent residency) is a separate immigration status that authorises a foreigner to live in Thailand for a specified period, usually one year, and can be renewed. The permit is issued after a comprehensive application that includes proof of income, health insurance, and sometimes a background check, and it is valid for a longer period than the certificate. Eligibility for a residence certificate is limited to foreigners who already hold a valid visa or residence permit and have a registered address in Thailand. Tourists, short‑stay visa holders, or those on a visa that does not allow registration are not eligible. The certificate is only valid for 90 days from the date of issue, after which a new certificate must be obtained if the address remains unchanged. Applicants must present a passport, a copy of their visa or residence permit, and a proof of address such as a utility bill or lease agreement. The certificate is used mainly for banking, driving licences, and property purchases, whereas the residence permit is required for long‑term residency, employment, and certain business activities. Because the certificate is not an immigration document, it cannot be used to prove legal stay for immigration‑related matters.

Issuing a certificate is quick: submit the form, pay THB 500, and receive it in 1–3 days. A permit, however, requires a longer, multi‑step process and is stamped on the passport for travel.