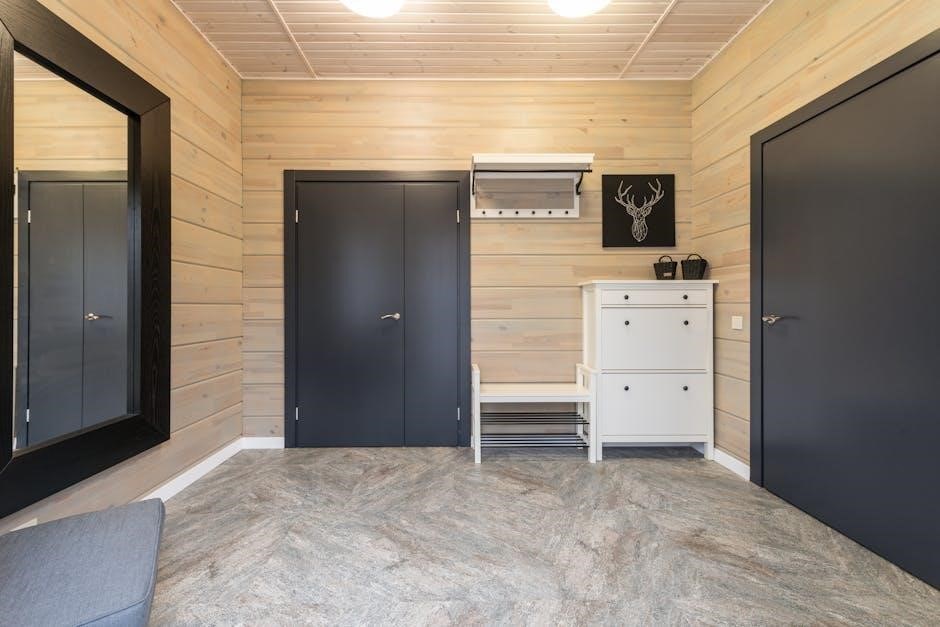
Installing sliding closet door floor guides on carpet ensures smooth operation, prevents derailment, and maintains proper door alignment. These guides are essential for stability and longevity of your closet doors.
1.1 Importance of Floor Guides for Sliding Closet Doors
Floor guides are crucial for maintaining the stability and alignment of sliding closet doors, especially on carpeted floors. They prevent doors from derailing or swinging out of track, ensuring smooth operation. By providing a fixed path, floor guides reduce friction and wear on the door and track system. They also accommodate the added height of carpeting, preventing doors from catching or dragging. This enhances durability and extends the lifespan of the doors. Additionally, floor guides help maintain consistent door alignment, which is essential for proper functionality. Without a floor guide, doors may shift or wobble, leading to potential damage or safety hazards. Regular use of floor guides ensures a seamless and hassle-free closet door experience.
1.2 Overview of the Installation Process
Installing sliding closet door floor guides on carpet involves several straightforward steps. First, gather necessary tools and materials, ensuring compatibility with your door thickness and carpet type. Begin by pulling back the carpet to expose the floor, then measure and mark the guide’s position. Securely attach the floor guide using appropriate fasteners, ensuring it aligns with the door’s bottom track. Adjust the guide to accommodate the carpet’s height, using risers if needed; Finally, test the door’s movement to ensure smooth operation. Proper installation requires careful planning and precise measurements to avoid misalignment. By following these steps, you can achieve a stable and efficient closet door system that operates smoothly over carpeted surfaces.

Tools and Materials Needed
Essential tools include a tape measure, utility knife, and screwdriver. Required materials are the floor guide, carpet risers, and screws; wood screws are optional for added security.
2.1 List of Required Tools
To successfully install sliding closet door floor guides on carpet, you will need several essential tools. A tape measure is crucial for accurate measurements, ensuring proper alignment and positioning. A utility knife or carpet cutter will help you safely pull back and cut the carpet as needed. A screwdriver, preferably a Phillips-head, is necessary for securing the floor guide and adjusting any components. Additionally, a small wrench or pliers may be handy for tightening bolts or adjusting the guide’s alignment. Optional tools include a drill for pre-drilling screw holes and a level to ensure the floor guide is perfectly horizontal. Having these tools ready will streamline the installation process and help achieve professional-looking results.
2.2 List of Required Materials
The materials needed for installing sliding closet door floor guides on carpet include the guides themselves, typically made of durable materials like steel or nylon. Carpet risers or shims are essential to elevate the guide above the carpet, ensuring smooth door movement. Mounting hardware, such as screws and bolts, is provided with most floor guide kits. Additional materials may include plastic wedges or spacers to adjust the guide’s height in 1/8-inch increments. Some kits offer adjustable rollers or brackets for compatibility with various door thicknesses. Ensure all materials are compatible with your door’s size and type to achieve optimal performance and stability. Having these components ready will facilitate a seamless installation process and ensure your closet doors function smoothly for years to come.

Preparation Steps
Preparation involves pulling back the carpet, checking door alignment, measuring the guide’s position, and ensuring the floor is ready for secure installation to guarantee a stable and proper setup.
3.1 Checking Door Alignment
Before installing the floor guide, ensure the sliding closet doors are properly aligned with the track. Misaligned doors can cause friction, leading to poor functionality. Check if the doors glide smoothly without catching or rubbing against the frame. If they wobble or stick, adjust the rollers or tracks accordingly. Proper alignment ensures the floor guide will function effectively, preventing further issues. Use a plumb line to verify the door’s vertical alignment and make necessary adjustments to the track or hinges. This step is crucial for the floor guide to work correctly and maintain smooth door operation over the carpet. Ensuring alignment now prevents future problems and extends the door’s lifespan.
3.2 Measuring the Position of the Floor Guide
Accurately measuring the position of the floor guide is essential for proper installation. Start by identifying the center of the door opening and marking it with a pencil. Measure the thickness of the door to ensure the guide aligns correctly. Use a ruler or measuring tape to mark the spot where the floor guide will be placed, ensuring it is centered under the door. If installing over carpet, measure the carpet’s thickness to determine if risers or shims are needed. Double-check the measurements to ensure the guide is positioned evenly and aligned with the door’s movement. Proper measurement ensures the guide fits securely and functions smoothly, preventing misalignment or instability. This step is critical for a successful installation. Use a level to confirm the markings are straight and accurate.
3.3 Preparing the Carpet and Floor Area
Before installing the floor guide, ensure the carpet and floor area are properly prepared. Start by vacuuming or sweeping the floor to remove any debris. If the carpet is thick, use a utility knife to carefully cut an X-shaped incision at the marked position for the guide, allowing easy access to the floor beneath. Fold the carpet flaps back and secure them temporarily with tape to expose the subfloor. If the floor is uneven or requires adjustment, use shims or risers to level the surface. Ensure the area is dry and free of dust for a secure installation. Proper preparation ensures the floor guide is installed correctly and functions smoothly. This step is crucial for maintaining the door’s stability and preventing future adjustments. Taking the time to prepare the area will result in a professional-looking installation.
Installation Steps
Installing sliding closet door floor guides on carpet involves pulling back the carpet, positioning the guide, marking the spot, exposing the floor, and securing the guide firmly.
4.1 Pulling Back the Carpet
Pulling back the carpet is the first step in installing sliding closet door floor guides. Gently fold the carpet away from the wall to expose the floor beneath. Use a utility knife to carefully cut the carpet if it is tightly fitted, ensuring not to damage the underlying material. Once the carpet is pulled back, use a pry bar or similar tool to hold it in place temporarily. This step allows easy access to the floor for secure installation of the guide. Make sure the area is clean and free from debris before proceeding. Properly securing the carpet during this process prevents damage and ensures a smooth installation. This step is crucial for accurately positioning the floor guide and achieving optimal door alignment. By carefully pulling back the carpet, you create a stable surface for the guide, ensuring long-lasting performance and smooth door operation.
4.2 Positioning the Floor Guide
Positioning the floor guide accurately is essential for proper door alignment and smooth operation. Align the guide with the center of the sliding closet door, ensuring it matches the door’s width and thickness. Use a measuring tape to verify the guide’s placement relative to the door’s bottom edge. Place the guide on the exposed floor, ensuring it is level and centered. Adjust the guide slightly if necessary to accommodate the door’s movement and alignment. Double-check the guide’s position against the door’s roller track to ensure compatibility. Once satisfied with the alignment, use a marker to mark the screw holes on the floor. Proper positioning ensures the guide will effectively stabilize the door and prevent it from derailing. This step requires precision to guarantee optimal performance and longevity of the sliding closet door system.
4.3 Marking the Installation Spot
After positioning the floor guide, use a marker to clearly mark the installation spot on the floor. Ensure the mark aligns with the center of the guide and corresponds to the door’s bottom edge; Use a level to verify the mark is straight and level. If the guide has pre-drilled screw holes, mark each hole’s location on the floor with a fine-tip marker. For carpeted floors, carefully cut a small X in the carpet at the marked spot to expose the underlying floor. This step ensures precise placement and prevents misalignment during installation. Double-check the marks against the guide’s dimensions to confirm accuracy. Proper marking is critical for a secure and even installation, ensuring the sliding closet door operates smoothly and remains stable over time.
4.4 Exposing the Floor for Secure Installation
To ensure a secure installation, carefully expose the floor beneath the carpet at the marked installation spot. Use a utility knife to cut an X-shaped incision in the carpet, creating flaps that can be folded back. This allows access to the floor without removing large sections of carpet. Gently pry the carpet flaps open using a screwdriver or similar tool, ensuring the floor is visible and clear of debris. Avoid cutting too deeply or widely, as this could damage the carpet or underlying flooring. Properly exposing the floor ensures the guide can be anchored securely, providing stability and preventing future misalignment. This step is crucial for a durable and reliable installation, especially on carpeted surfaces where additional support is needed for the sliding closet door system.
4.5 Securing the Floor Guide
Once the floor is exposed, position the floor guide in the marked location, ensuring it aligns with the door’s bottom edge. Use screws provided with the floor guide to secure it to the floor. Tighten the screws firmly to ensure stability. If the floor is concrete or uneven, consider using anchor bolts for added security. After installation, test the door’s movement to ensure smooth operation. Properly securing the floor guide prevents wobbling and ensures the door stays on track. This step is critical for maintaining the door’s functionality and longevity, especially on carpeted floors where stability is key. A secure installation guarantees years of trouble-free use and aligns with the door’s rollers for seamless sliding. Always double-check the alignment before finalizing the screws to avoid future adjustments.

Adjusting and Testing the Door
After installation, adjust the floor guide to ensure proper alignment with the door’s rollers. Test the door’s movement by sliding it back and forth to ensure smooth operation.
5.1 Adjusting the Floor Guide for Proper Alignment
Proper alignment of the floor guide is crucial for smooth door operation. Ensure the guide is centered under the door’s rollers and adjust its position if necessary. Use shims or risers to level the guide, especially on uneven floors. For doors with varying thicknesses, adjust the guide’s width to accommodate the door properly. After adjustments, slide the door back and forth to test its movement. Make fine-tuned adjustments as needed to eliminate any wobbling or misalignment. Proper alignment ensures the door glides effortlessly and remains stable, preventing it from derailing or dragging on the floor. This step is essential for maintaining the longevity and functionality of your sliding closet doors.
5.2 Testing the Door Movement
After adjusting the floor guide, thoroughly test the door’s movement to ensure smooth operation. Slide the door from one end to the other, checking for any resistance or wobbling. Verify that the door stays aligned with the track and does not drag on the carpet. If the door moves unevenly, further adjustments to the guide may be necessary. Repeat the process until the door glides effortlessly across the entire opening. Proper testing ensures the door operates quietly, remains stable, and maintains consistent alignment. This step is crucial for confirming the success of the installation and ensuring long-term functionality of your sliding closet doors.
Tips for Optimal Performance
Ensure door stability by selecting the right floor guide and maintaining proper carpet height. Regularly clean the track and guide to prevent dust buildup and ensure smooth operation.
6.1 Ensuring Door Stability
Ensuring door stability is crucial for the proper functioning of sliding closet doors on carpet. A well-installed floor guide helps maintain alignment and prevents doors from swinging out of track. Use adjustable floor guides to accommodate varying door thicknesses and carpet heights. Regularly check and tighten screws to prevent loosening over time. Additionally, ensure the carpet is securely fastened around the guide to avoid interference. Proper installation and maintenance of the floor guide will enhance door stability, providing smooth and consistent operation. By addressing any misalignment or carpet obstructions promptly, you can extend the lifespan of both the door and the guide. Stability ensures and efficient door movement, making it essential for optimal performance.
6.2 Choosing the Right Floor Guide
Selecting the appropriate floor guide is essential for sliding closet doors on carpet. Opt for guides made from durable materials like steel or nylon for long-lasting performance. Ensure the guide is adjustable to accommodate door thicknesses between 3/4 to 1-3/8 inches. Consider models with carpet risers to elevate the guide above the carpet pile, preventing interference. Universal designs are ideal for compatibility with various bypass door systems. Look for guides with multiple rollers for smoother door movement and stability; When choosing, also consider the height adjustability to customize the fit for your specific carpet thickness. A well-chosen floor guide enhances door operation, reduces wear, and ensures years of trouble-free use. Always compare features and reviews to find the best fit for your closet door system.
6.3 Maintaining the Carpet and Floor Guide
Regular maintenance of both the carpet and floor guide ensures optimal performance of sliding closet doors. Vacuum the carpet around the guide to prevent debris buildup, which could obstruct door movement. Avoid using harsh chemicals or abrasive cleaners, as they may damage the carpet or discolor the guide; Periodically inspect the floor guide for alignment and tighten any loose screws. Ensure the guide remains securely fastened to the floor and properly positioned above the carpet using risers. If the carpet thickness changes, adjust the risers to maintain proper clearance. Clean the rollers or gliders on the floor guide to keep them free from dust and dirt. Replace any worn-out components promptly to prevent door misalignment. Proper upkeep extends the life of both the carpet and floor guide, ensuring smooth and reliable door operation over time.

Troubleshooting Common Issues
Common issues include door misalignment, carpet interference, or improper guide installation. Check alignment, adjust guides, and ensure the door thickness matches the guide specifications for smooth operation.
7.1 Addressing Door Misalignment
Door misalignment is a common issue that can disrupt smooth operation. Check if the floor guide is properly secured and aligned with the door’s bottom track. Ensure the door rollers are clean and free from debris. If the door still wobbles, adjust the guide’s position slightly. Use shims or risers to level the guide on uneven floors. Test the door movement after each adjustment to ensure proper alignment. If misalignment persists, verify that the door thickness matches the guide’s specifications. Proper alignment ensures smooth sliding and prevents wear on the track and rollers. Regular checks and adjustments can prevent future misalignment issues, ensuring long-term functionality and stability of your sliding closet doors.
7.2 Fixing Carpet Interference
Carpet interference can cause sliding closet doors to drag or catch, disrupting smooth operation. To fix this, ensure the floor guide is properly elevated above the carpet using risers or shims. Cut an X in the carpet at the marked guide position and fold back the flaps to expose the floor. Secure the guide with screws, ensuring it’s level and stable. If the carpet is too thick, use adjustable risers to raise the guide in 1/8-inch increments until the door moves smoothly. Regularly check the carpet height and adjust the guide as needed to maintain proper clearance. This prevents friction and ensures the door glides effortlessly. Proper elevation and alignment are key to resolving carpet interference issues and maintaining optimal door functionality.
7.3 Adjusting for Door Thickness

Adjusting the floor guide for door thickness ensures proper alignment and smooth operation. Measure the door thickness to determine the correct guide height. Most guides are adjustable, allowing you to accommodate doors ranging from 3/4 to 1-3/8 inches thick. Use the provided risers or shims to elevate the guide, ensuring the door bottom clears the carpet without dragging. Secure the guide tightly after adjustment. If the door still binds, slightly increase the guide height. Regular checks and fine-tuning are essential for maintaining optimal door functionality and carpet compatibility.
Installing sliding closet door floor guides on carpet ensures smooth operation, prevents doors from derailing, and enhances both functionality and longevity with proper alignment and maintenance.
8.1 Final Check and Maintenance
After installing the floor guide, perform a final inspection to ensure all components are securely fastened and properly aligned. Test the door’s smooth operation by sliding it back and forth to confirm it glides effortlessly without catching or misaligning. Regular maintenance involves checking for loose screws, cleaning dust or debris from the guide, and ensuring the carpet risers remain securely in place. Over time, adjustments may be needed to accommodate wear or changes in carpet thickness. By following these steps, you can maintain optimal performance and extend the lifespan of your sliding closet door system. Proper upkeep ensures continued stability and smooth functionality, preventing future issues and keeping your doors operating like new.
8.2 Enjoying Smooth Door Operation
Once the floor guide is properly installed, you can enjoy the seamless operation of your sliding closet doors. The guides ensure the doors glide smoothly, eliminating common issues like misalignment or catching on the carpet. This not only enhances the functionality of your closet but also improves the overall appearance of the room. With the doors operating effortlessly, you can access your belongings with ease and convenience. The installation of floor guides provides long-term stability, reducing the risk of doors jumping off their tracks and minimizing wear and tear on both the doors and the carpet. By completing the installation correctly, you can appreciate the quiet, smooth motion of your closet doors, making daily use a hassle-free experience.