Manual to automatic conversion kits enable drivers to switch from manual to automatic transmissions‚ offering ease of use and improved performance. These kits simplify the process‚ making modern driving more convenient while retaining vehicle functionality. However‚ the complexity of the conversion requires careful planning and expertise.
1.1 Overview of Manual to Automatic Conversion
Manual to automatic conversion involves replacing a vehicle’s manual transmission with an automatic transmission system. This process transforms the driving experience by eliminating the need for manual gear shifting‚ offering greater convenience and ease of operation. The conversion typically includes installing an automatic transmission unit‚ along with necessary components such as a transmission cooler‚ electrical wiring‚ and control modules. It also requires adjustments to the vehicle’s electrical system‚ throttle linkage‚ and clutch pedal assembly. While the process can be complex and costly‚ it enhances driving comfort‚ especially in urban environments or for inexperienced drivers. Proper planning and professional expertise are often essential for a successful conversion‚ as it involves both mechanical and electrical modifications.
1.2 Historical Background of Transmission Conversions
The concept of transmission conversions dates back to the early 20th century when automatic transmissions began gaining popularity. Initially‚ automatics were limited to high-end vehicles‚ but advancements made them more accessible. The 1940s and 1950s saw the rise of hydraulic automatic transmissions‚ leading to increased demand for conversions in older or manual vehicles. Over the decades‚ the development of more efficient and compact automatic units simplified the conversion process. Modern kits now offer comprehensive solutions‚ including electrical controls and compatible components‚ making manual-to-automatic conversions more feasible for a wide range of vehicles. This evolution reflects the automotive industry’s continuous pursuit of innovation and driver convenience‚ adapting to changing consumer preferences and technological advancements.
Benefits of Converting Manual to Automatic
Converting to automatic reduces driver effort‚ enhances highway performance‚ and improves off-road capabilities. It also offers convenience for inexperienced drivers‚ making driving smoother and more enjoyable overall.
2.1 Reduced Driver Effort
Converting a manual transmission to automatic significantly reduces driver effort‚ eliminating the need for constant clutch pedal engagement and manual gear shifting. This makes driving smoother and less physically demanding‚ especially in heavy traffic or during long commutes. Automatic transmissions handle gear changes seamlessly‚ allowing drivers to focus more on the road and less on operating the vehicle. The absence of a clutch pedal also simplifies the driving experience‚ making it more accessible for new or inexperienced drivers. This reduction in effort enhances overall comfort and convenience‚ particularly in urban environments where frequent stopping and starting are common. By minimizing the physical and mental demands of driving‚ an automatic transmission conversion can lead to a more enjoyable and stress-free driving experience.
2.2 Improved Highway Cruising Performance
Converting to an automatic transmission significantly enhances highway cruising performance by providing smoother and more seamless gear transitions. Automatic transmissions optimize engine RPMs at higher speeds‚ reducing strain on the engine and improving fuel efficiency. This results in a quieter and more comfortable driving experience‚ especially on long highway drives. The absence of manual shifting allows the vehicle to maintain consistent momentum‚ which is particularly beneficial for maintaining speed on inclines or when towing. Additionally‚ modern automatic transmissions often feature advanced torque converters and gearing systems that are designed to maximize performance and efficiency at cruising speeds. This makes highway driving more enjoyable and less fatiguing‚ as the vehicle can effortlessly adapt to varying road conditions without constant driver input.
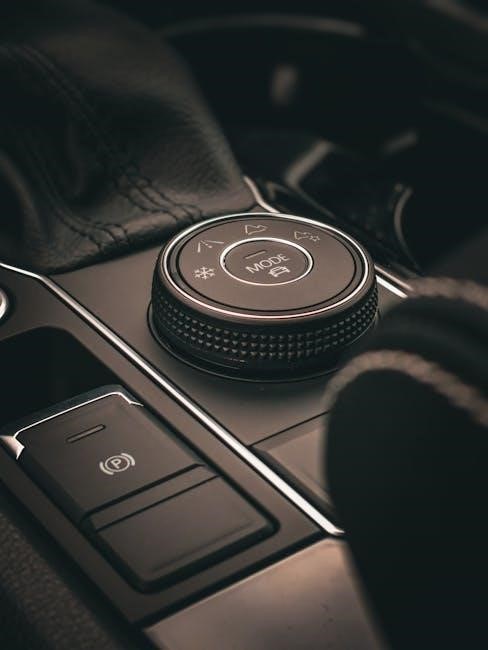
2.3 Enhanced Off-Road Driving Capabilities
Converting to an automatic transmission can significantly enhance off-road driving capabilities by providing smoother and more controlled power delivery. Automatic transmissions eliminate the need for manual shifting‚ reducing driver fatigue and allowing for better focus on navigating challenging terrain. The automatic system’s ability to maintain optimal engine RPMs ensures consistent traction‚ which is crucial for off-road conditions. Additionally‚ many modern automatic transmissions feature specialized modes or settings designed to optimize performance in low-traction environments. This makes it easier to handle steep inclines‚ rocky surfaces‚ and other demanding off-road scenarios. The improved torque distribution and seamless gear transitions of an automatic transmission can make off-road adventures more accessible and enjoyable‚ especially for drivers who value both performance and convenience in rugged settings.
2.4 Convenience for New or Inexperienced Drivers
Converting a manual transmission to an automatic offers significant convenience for new or inexperienced drivers. Automatic transmissions eliminate the need to operate a clutch pedal and manually shift gears‚ simplifying the driving experience. This reduction in complexity allows novice drivers to focus more on road awareness and safety rather than the mechanics of shifting. For those still learning to drive‚ an automatic transmission minimizes the risk of stalling the vehicle‚ especially in stop-and-go traffic or uphill starts. The ease of use also reduces stress and fatigue during the learning process‚ making it an ideal choice for drivers who are not yet comfortable with manual shifting. Additionally‚ automatic transmissions provide smoother acceleration and deceleration‚ which can be particularly beneficial in urban driving environments where frequent stopping and starting are common.
Step-by-Step Guide to Manual to Automatic Conversion
A step-by-step guide outlines the process‚ starting with assessing the vehicle’s compatibility‚ selecting the right conversion kit‚ and preparing components; Installing the automatic transmission‚ connecting electrical systems‚ and testing ensure a smooth transition.
3.1 Assessing the Vehicle for Conversion Feasibility
Assessing the vehicle for conversion feasibility involves evaluating compatibility between the manual and automatic components. This includes checking the engine‚ drivetrain‚ and electrical systems to ensure smooth operation. Additionally‚ budget and labor availability are considered to determine if the conversion is practical. Proper assessment helps identify potential challenges and ensures all necessary parts are available. A thorough evaluation prevents costly surprises and ensures the conversion’s success; Factors like transmission type and vehicle age also play a role. Correctly matching components guarantees optimal performance post-conversion. Ensuring compatibility is crucial for a seamless transition from manual to automatic.
3.2 Choosing the Right Conversion Kit
Choosing the right conversion kit is crucial for a successful manual to automatic transmission swap. Research is essential to ensure compatibility with your vehicle’s make‚ model‚ and engine. Consider the type of automatic transmission‚ such as the 4L80 or 4R70W‚ and whether it suits your driving needs. Additionally‚ evaluate the components included in the kit‚ such as the transmission unit‚ adapters‚ and wiring harness. Some kits may require a standalone transmission controller‚ like the Baumman or Optishift‚ to simplify wiring without altering the factory PCM. Budget and labor costs are also important factors. Ensure the kit includes all necessary parts‚ such as a transmission cooler‚ to avoid unexpected expenses. Properly matching the kit to your vehicle ensures a smooth and efficient conversion process. Always consult experts or forums for recommendations tailored to your specific vehicle.
3.3 Preparing the Vehicle Components
Preparing the vehicle components is a critical step in the conversion process. Start by removing the manual transmission‚ clutch pedal‚ and associated linkages. Inspect and clean the bellhousing and surrounding areas to ensure a smooth installation. If necessary‚ modify the bellhousing to accommodate the automatic transmission. Replace the manual-specific components‚ such as the clutch master cylinder‚ with brake pedal assemblies designed for automatic transmissions. Electrical components‚ like the PCM‚ may need reprogramming or replacement to support the automatic transmission. Additionally‚ consider upgrading the driveshaft or shortening it to fit the new transmission. Ensure all cooling lines and systems are compatible with the automatic transmission. Proper preparation of these components ensures a seamless transition and prevents future mechanical issues. Always refer to the conversion kit’s instructions for specific requirements.
3.4 Installing the Automatic Transmission
Installing the automatic transmission requires precision and care. Begin by aligning the transmission with the engine‚ ensuring proper fitment and alignment of the bellhousing. Secure the transmission using the provided mounting hardware‚ tightening bolts evenly to avoid damage. Connect the driveshaft to the transmission‚ ensuring it is properly seated and secured. Install the torque converter‚ making sure it is correctly engaged with the flex plate. Attach the transmission cooler lines to the radiator and ensure all electrical connectors are securely plugged in. Double-check all fluid levels and connections before starting the engine. If unsure‚ consult a professional to avoid costly mistakes. Proper installation ensures smooth operation and longevity of the automatic transmission system.
3.5 Connecting Electrical and Mechanical Components
Connecting electrical and mechanical components is crucial for the automatic transmission to function properly; Start by installing the transmission control module (TCM) and connecting it to the vehicle’s electrical system using the provided wiring harness. Ensure all sensors‚ such as the throttle position sensor and speed sensor‚ are securely connected to the transmission and the ECU. Mechanically‚ attach the driveshaft to the transmission output shaft‚ ensuring it is properly seated and secured. Install the torque converter‚ aligning it with the flex plate‚ and connect the transmission cooler lines to the radiator. Replace the manual shifter with an automatic gear selector‚ adjusting the linkage to fit the new transmission. Additionally‚ modify the clutch pedal assembly to accommodate the automatic setup‚ ensuring the brake pedal is adjusted if necessary. Finally‚ connect the transmission fluid lines and fill the system with the appropriate automatic transmission fluid (ATF). After completing all connections‚ test the system to ensure smooth operation and address any issues promptly.
3.6 Testing and Fine-Tuning the Conversion
After completing the installation‚ thorough testing and fine-tuning are essential to ensure the automatic transmission operates smoothly. Begin with a visual inspection to check for any fluid leaks or loose connections. Conduct a test drive in a controlled environment‚ such as an empty parking lot‚ to assess the transmission’s performance. Monitor how the vehicle accelerates‚ shifts gears‚ and responds to throttle input. Pay attention to any unusual noises‚ hesitation‚ or slipping during acceleration. If issues arise‚ use diagnostic tools like an OBD-II scanner to identify problems in the transmission control module (TCM) or wiring. Fine-tune the transmission by adjusting the TCM settings or replacing faulty sensors. Repeat the test drive under various conditions‚ including highway cruising and stop-and-go traffic‚ to ensure consistent performance. Address any remaining issues before considering the conversion complete.
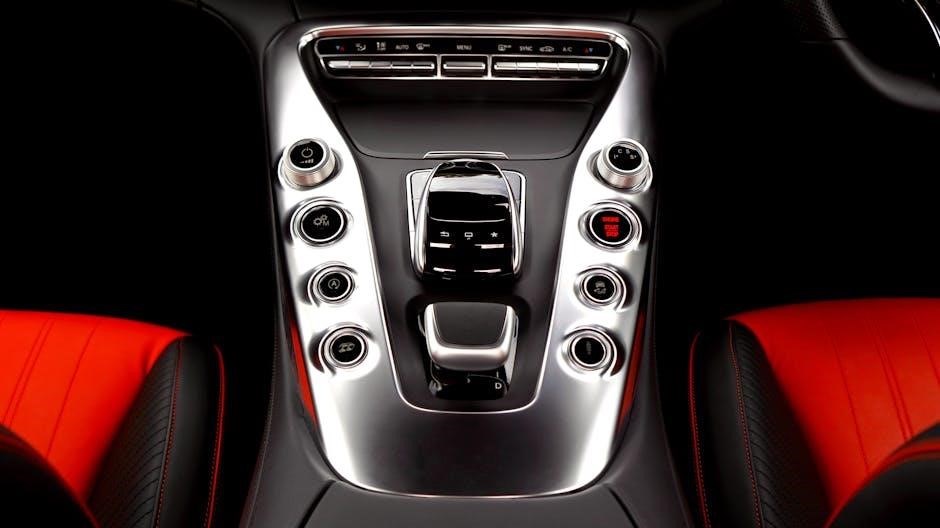
Key Components of a Conversion Kit
A manual to automatic conversion kit includes the automatic transmission unit‚ a transmission cooler‚ and electrical wiring with control modules. These components ensure smooth operation and integration;
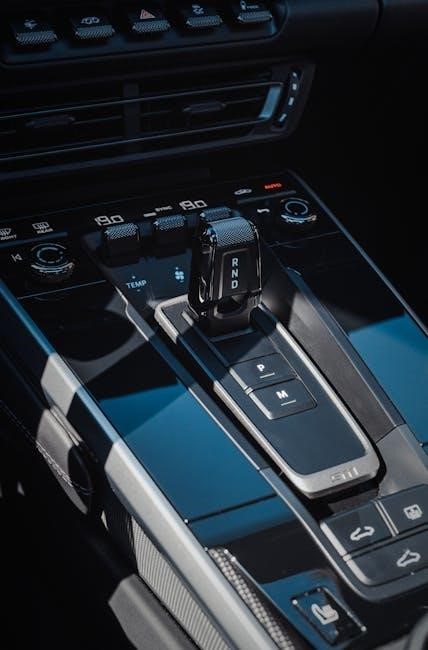
4.1 The Automatic Transmission Unit
The automatic transmission unit is the core component of any conversion kit‚ designed to replace the manual gearbox. It must be compatible with the vehicle’s engine and drivetrain. Modern units like the 4L80 or 4R70W are popular choices due to their durability and performance. Proper installation ensures smooth gear shifts and optimal power delivery. Compatibility checks are essential to avoid mechanical issues. The unit’s torque capacity should match the engine’s output‚ especially in high-performance vehicles. Additionally‚ the transmission’s electronic control module must integrate with the vehicle’s existing systems. Choosing the right unit is crucial for a successful conversion‚ ensuring reliability and driving satisfaction. Proper installation by a skilled technician is highly recommended.
4.2 Transmission Cooler and Cooling System
A transmission cooler is essential for maintaining optimal temperatures during automatic transmission operation. Unlike manual transmissions‚ automatics generate significant heat‚ especially under heavy loads or towing conditions. The cooler is typically a tube-and-fin or plate-style unit‚ mounted in the radiator’s airflow or in front of it. Proper installation ensures efficient heat dissipation‚ preventing overheating and potential damage. The cooling system includes hoses‚ fittings‚ and sometimes an electric fan for enhanced airflow. Inadequate cooling can lead to transmission failure‚ making this component critical. Compatibility with the transmission and vehicle setup is vital. Always follow manufacturer guidelines for sizing and placement to ensure reliable performance and longevity of the automatic transmission unit. Proper installation by a qualified technician is recommended to avoid costly repairs.
4.3 Electrical Wiring and Control Modules
Electrical wiring and control modules are crucial for integrating an automatic transmission into a vehicle. The conversion requires adapting the vehicle’s wiring harness to accommodate the automatic transmission’s electronic controls. This includes installing a transmission control module (TCM) and potentially a standalone controller like the Baumann or Optishift unit. These modules manage gear shifts‚ torque converter engagement‚ and communication with the vehicle’s ECU. Additional components such as sensors for temperature‚ pressure‚ and throttle position may need to be installed. Proper wiring ensures seamless communication between the TCM and other systems‚ preventing errors or malfunctions. Compatibility with the vehicle’s existing electrical architecture is essential‚ and professional installation is often recommended to avoid system conflicts or damage. Modern vehicles may require reprogramming the ECU to recognize the automatic transmission‚ ensuring all components function harmoniously. This step is critical for a smooth and reliable conversion process.
Cost Considerations for Manual to Automatic Conversion
The cost of converting a manual to an automatic transmission varies widely‚ depending on the transmission type‚ vehicle make‚ and whether a DIY or professional installation is chosen.
5.1 Parts and Materials Expenses
The cost of parts and materials for a manual to automatic conversion can vary significantly. Key components include the automatic transmission unit‚ which can range from $1‚500 to $4‚000 depending on the type and condition. A torque converter‚ typically priced between $300 and $800‚ is also essential. Additional expenses include a new clutch and brake pedal assembly‚ wiring harness‚ and transmission cooler. For older vehicles‚ a standalone transmission controller like the Baumman or Optishift may be required‚ adding $1‚000 to $2‚000 to the total. Other costs include a driveshaft‚ transmission pan‚ and necessary adapters. Prices for these components can fluctuate based on the vehicle’s make‚ model‚ and transmission type‚ making it important to research specific needs thoroughly.
5.2 Labor Costs for Professional Installation
Labor costs for professional installation of a manual to automatic conversion kit can vary widely depending on the mechanic’s expertise‚ workshop rates‚ and the complexity of the conversion. On average‚ labor costs range from $1‚000 to $3‚000‚ with high-performance or custom installations potentially exceeding this range. Experienced transmission specialists may charge higher rates due to the intricate nature of the process. Additionally‚ some shops may charge extra for diagnostics or unexpected repairs uncovered during the conversion. It’s essential to obtain detailed quotes from multiple professionals to compare prices and services. Labor costs often represent a significant portion of the total expense‚ making it crucial to balance quality and affordability when selecting a mechanic.
5.3 Total Cost Estimates
The total cost for a manual to automatic conversion can range from $3‚500 to $8‚000‚ depending on the vehicle and conversion complexity. Parts alone‚ including the transmission and necessary components‚ can cost between $1‚500 and $4‚000. Labor costs‚ as discussed earlier‚ typically add another $1‚000 to $3‚000‚ depending on the mechanic’s rates and the job’s difficulty. Additional expenses‚ such as transmission coolers‚ custom wiring‚ or drivetrain modifications‚ can further increase the total. High-performance or custom conversions may exceed these estimates. It’s essential to consult with a professional to get an accurate quote tailored to your specific vehicle and needs. Proper planning and budgeting are crucial to ensure the conversion is completed successfully without unexpected financial strain.
Tools and Materials Required
Essential tools include wrenches‚ screwdrivers‚ and a transmission jack. Materials like transmission fluid‚ gaskets‚ and wiring connectors are also necessary for a smooth conversion process.
6.1 Essential Tools for the Conversion Process
The conversion process requires a variety of specialized tools to ensure efficiency and safety. A transmission jack is crucial for safely lifting and maneuvering the heavy unit. Socket sets and wrenches‚ including metric and SAE sizes‚ are necessary for dismantling and reassembling components. Torque wrenches are essential for precise bolt tightening to manufacturer specifications. Pliers and punches come in handy for removing pins and clips. A multimeter is needed for diagnosing electrical connections‚ and a drain pan is required for handling transmission fluid. Additionally‚ a set of screwdrivers‚ both flathead and Phillips‚ is indispensable. Proper tools minimize risks and ensure a successful conversion. Using the right equipment helps maintain vehicle integrity and prevents costly errors.
6.2 Additional Materials for a Smooth Installation
Beyond essential tools‚ several materials are crucial for a seamless manual to automatic conversion. Transmission fluid‚ compatible with the new automatic unit‚ is necessary for proper lubrication. Gaskets and seals ensure leak-free connections between components. Adapters or converters may be required to integrate the automatic transmission with the existing drivetrain. Electrical connectors and wiring harness components are needed for hooking up sensors and control modules. A driveshaft adapter or spacer might be required to align the driveshaft correctly. Brake and throttle pedals may need adjustments or replacement to accommodate the automatic setup. Additionally‚ mounting brackets and crossmembers ensure the transmission is securely fastened. These materials are vital for overcoming installation challenges and ensuring the conversion functions smoothly. Proper preparation minimizes delays and ensures reliability post-conversion.
Troubleshooting Common Issues
Common issues during manual to automatic conversion include electrical component failures‚ fluid leaks‚ and improper transmission alignment. Regular inspections and diagnostic checks can help resolve these problems effectively.
7.1 Addressing Electrical Component Failures
Electrical issues are common during manual to automatic conversions‚ often due to faulty wiring or incorrect connections. Start by inspecting the wiring harness for damage or corrosion. Ensure all connectors are securely plugged in and compatible with the automatic transmission system. If using a standalone transmission controller‚ verify the wiring diagram matches the kit’s specifications. Loose connections or incorrect wiring can cause erratic behavior‚ such as unexpected shifting or failure to engage gears. In some cases‚ reprogramming the transmission control module (TCM) may be necessary to ensure proper communication with the engine and other vehicle systems. Always refer to the conversion kit’s manual for specific troubleshooting steps and consider consulting a professional if issues persist.
7.2 Resolving Mechanical Component Malfunctions
Mechanical issues during a manual to automatic conversion often arise from improper installation or incompatible parts. The torque converter‚ drive shaft‚ and transmission mounts are common problem areas. If the torque converter fails to engage‚ check its alignment with the crankshaft and ensure proper transmission fluid levels. A misaligned or damaged drive shaft can cause vibrations and performance issues‚ requiring precise measurement and adjustment. Transmission mounts must be securely fastened to prevent movement that could damage surrounding components. Always use components specifically designed for your vehicle and conversion kit to avoid compatibility problems. If mechanical malfunctions persist‚ consult the kit’s instructions or seek professional assistance to ensure proper alignment and installation. Regular inspections can help identify and resolve issues before they escalate.
Converting a manual to an automatic transmission can be rewarding but requires careful planning and expertise to execute successfully‚ balancing benefits and challenges effectively.
8.1 Recap of the Conversion Process
Converting a manual transmission to an automatic involves replacing the manual gearbox with a compatible automatic unit‚ adapting electrical systems‚ and modifying mechanical components. The process requires careful planning and expertise‚ as it involves complex steps like removing the manual transmission‚ installing the automatic unit‚ and connecting electrical controls. Additional components such as the steering column‚ pedal assembly‚ and transmission cooler must be updated to ensure compatibility. While the conversion can enhance driving convenience and performance‚ it demands precision and significant time. Proper tools and materials are essential to ensure a smooth installation. Success hinges on thorough preparation and adherence to specific guidelines tailored to the vehicle’s make and model. This process is not for beginners‚ as it requires advanced mechanical and electrical knowledge to avoid costly mistakes.
8.2 Is the Conversion Worth the Investment?
Deciding whether a manual to automatic conversion is worth the investment depends on personal preferences‚ driving habits‚ and long-term goals. For drivers seeking convenience and reduced effort‚ especially in urban or heavy traffic conditions‚ the switch can significantly enhance comfort and ease of use. Improved highway performance and smoother off-road capabilities are additional benefits. However‚ the high costs of parts‚ labor‚ and potential modifications may outweigh these advantages for some. It’s essential to evaluate the vehicle’s intended use‚ the driver’s experience level‚ and the overall budget. While the conversion offers practical improvements‚ it may not be cost-effective for everyone‚ making it crucial to weigh the benefits against the financial and time commitments required.